FPTN Project
FPTN is a fully custom-built VPN technology — developed from scratch, including the core protocol, server implementation, and cross-platform clients. It is a non-commercial, open-source project developed by volunteers and designed to bypass censorship.
The VPN-client is a mobile application or a compact desktop application with an interface located in the system tray. No registration process is required! We will send the access token via the bot on Telegram.
FPTN operates over the HTTPS protocol, effectively masking traffic and enabling users to bypass censorship restrictions. The project's source code is available on GitHub.
FPTN Project
FPTN — это полностью разработанная с нуля технология VPN, включая собственный протокол, сервер и кроссплатформенные клиенты. Это некоммерческий проект с открытым исходным кодом, развиваемый волонтерами и предназначенный для обхода цензуры.
VPN-клиент — мобильное приложение или миниатюрная программа для компьютера, интерфейс которой размещается в трее. Здесь нет процесса регистрации! Мы пришлем токен доступа через бота в Telegram
FPTN работает через протокол HTTPS, эффективно маскируя трафик и позволяя обходить ограничения цензуры. Исходный код проекта доступен на Github.
Download FPTN
Скачать FPTN
Установка и настройка
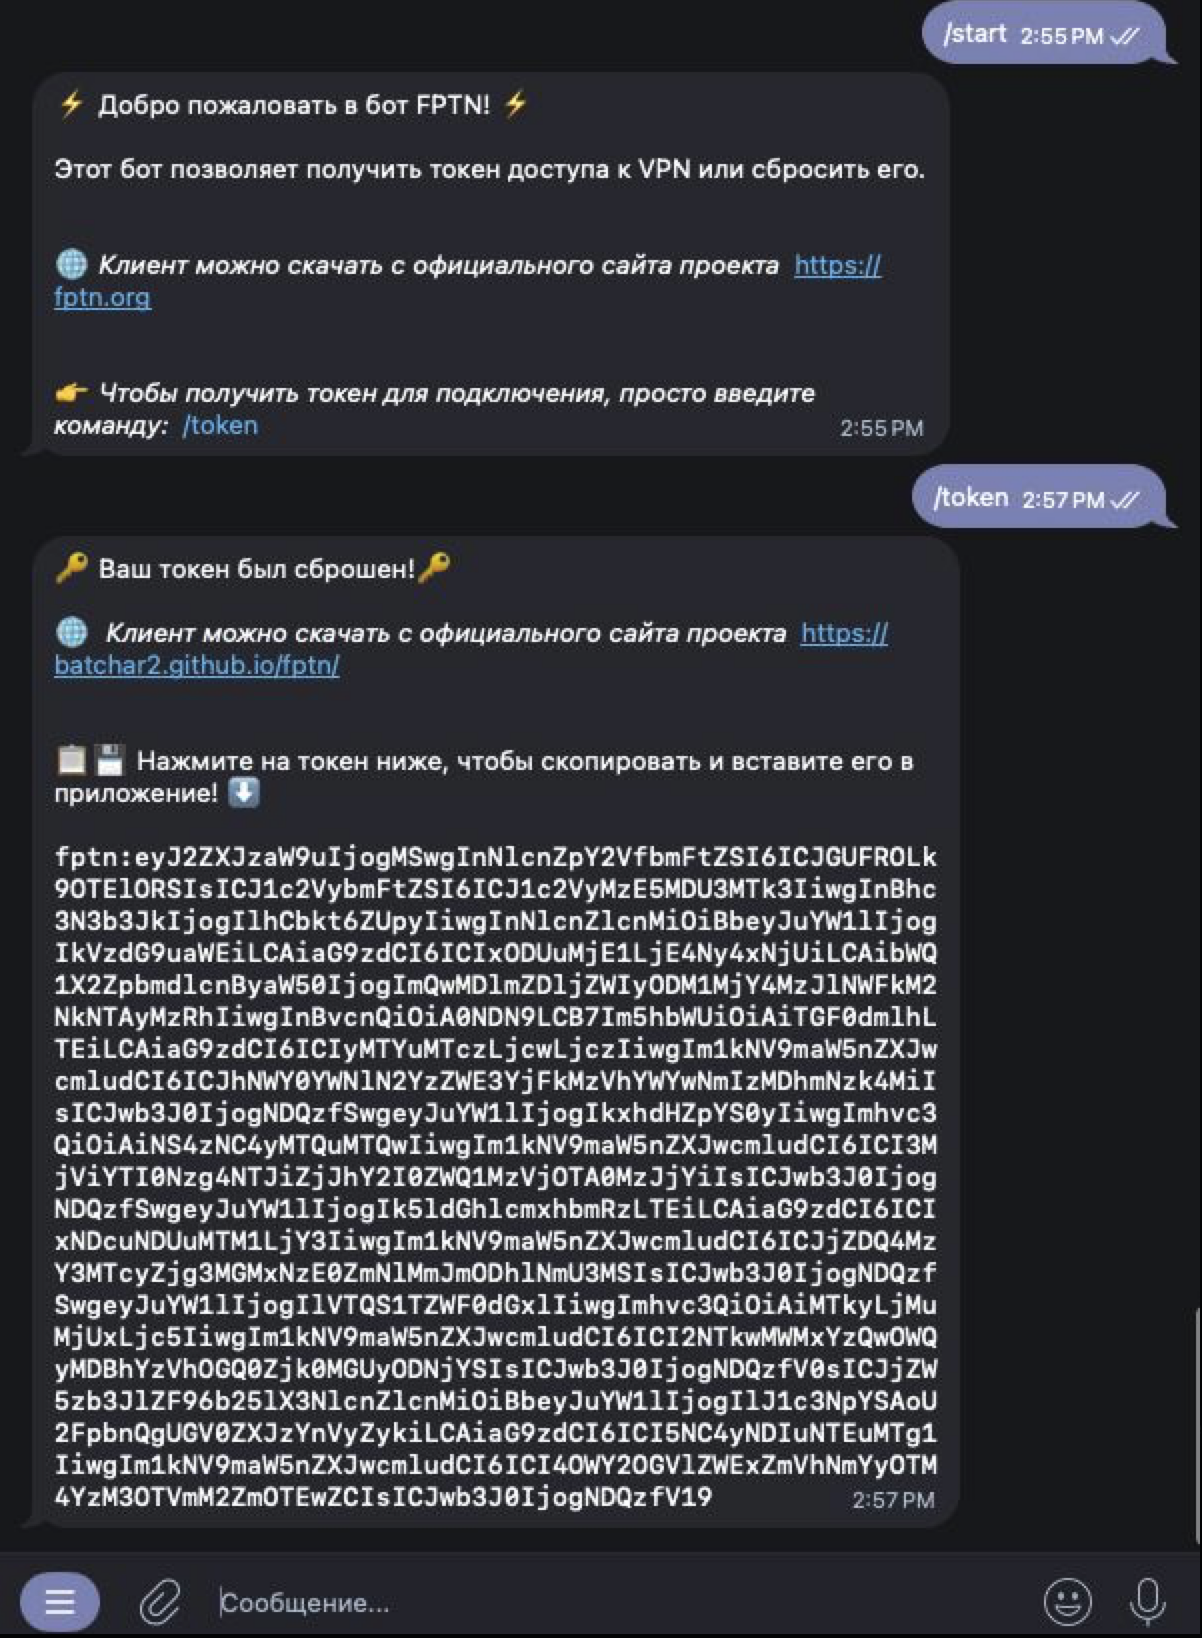
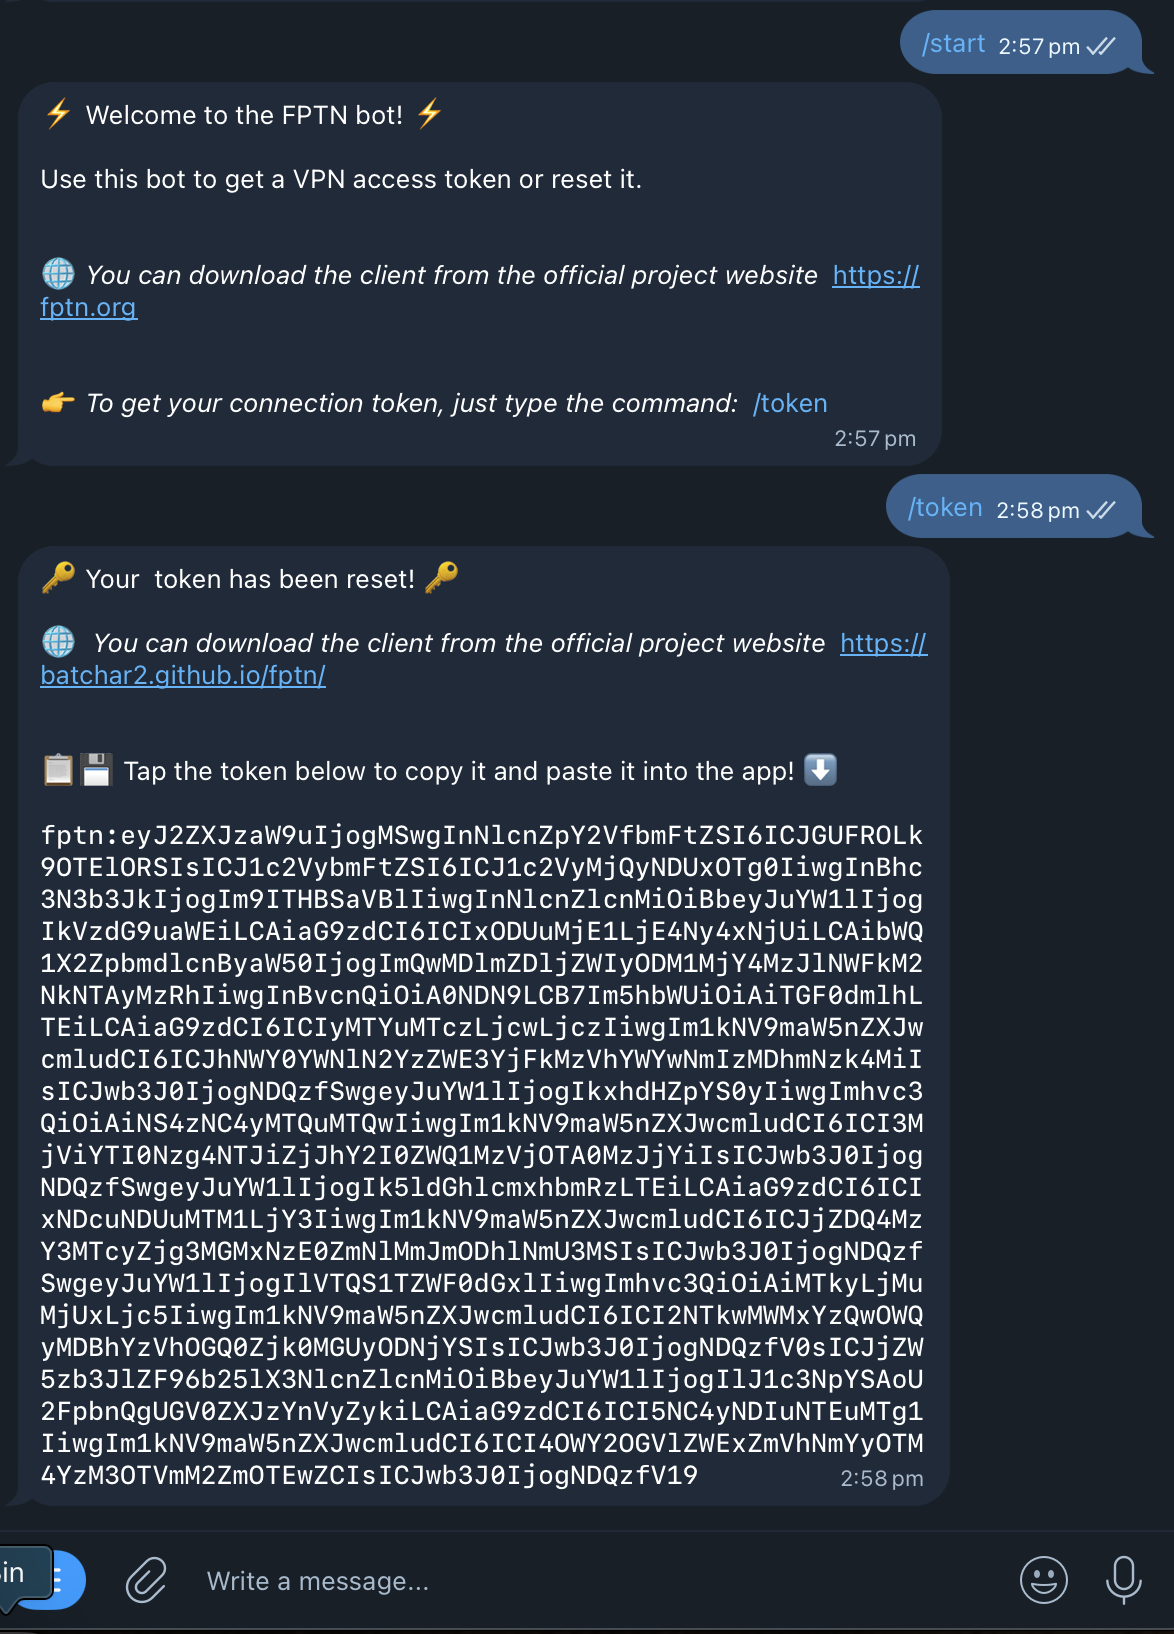
Перейдите в Telegram-бот и сгенерируйте токен командой /token, затем скопируйте его.
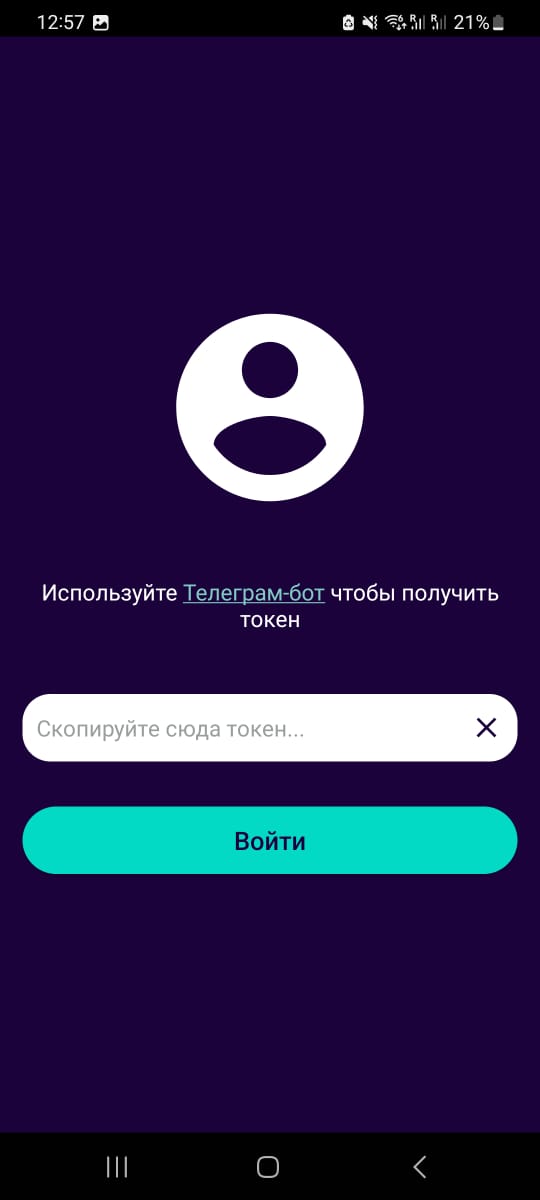
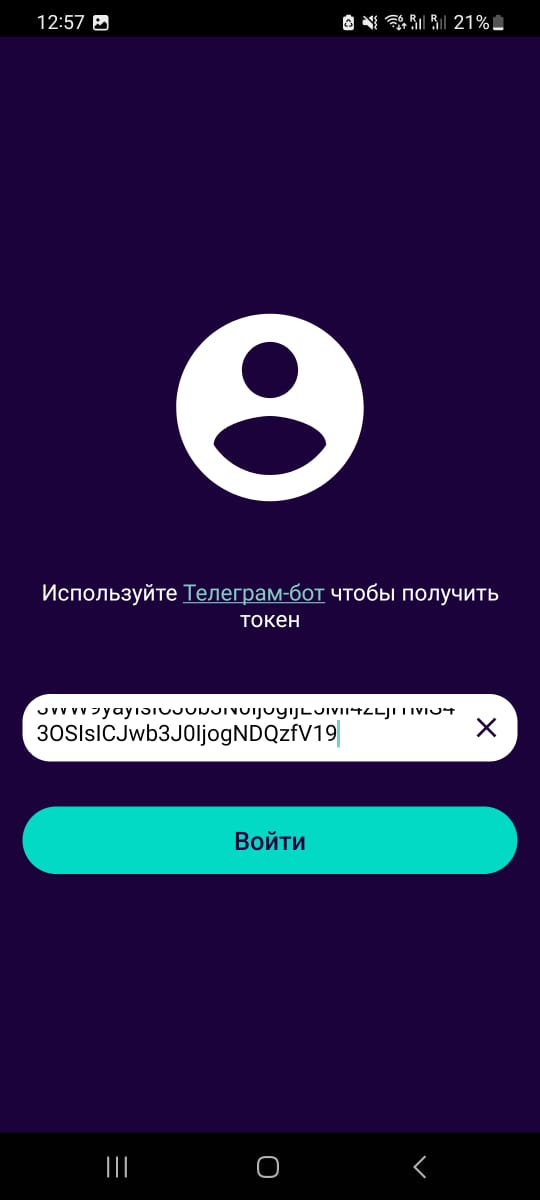
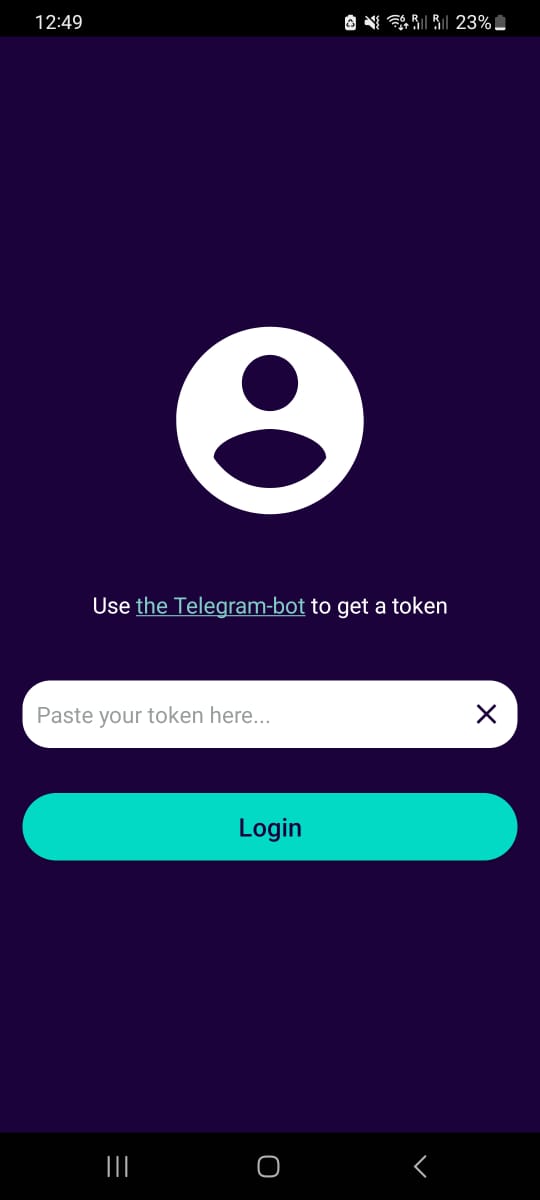
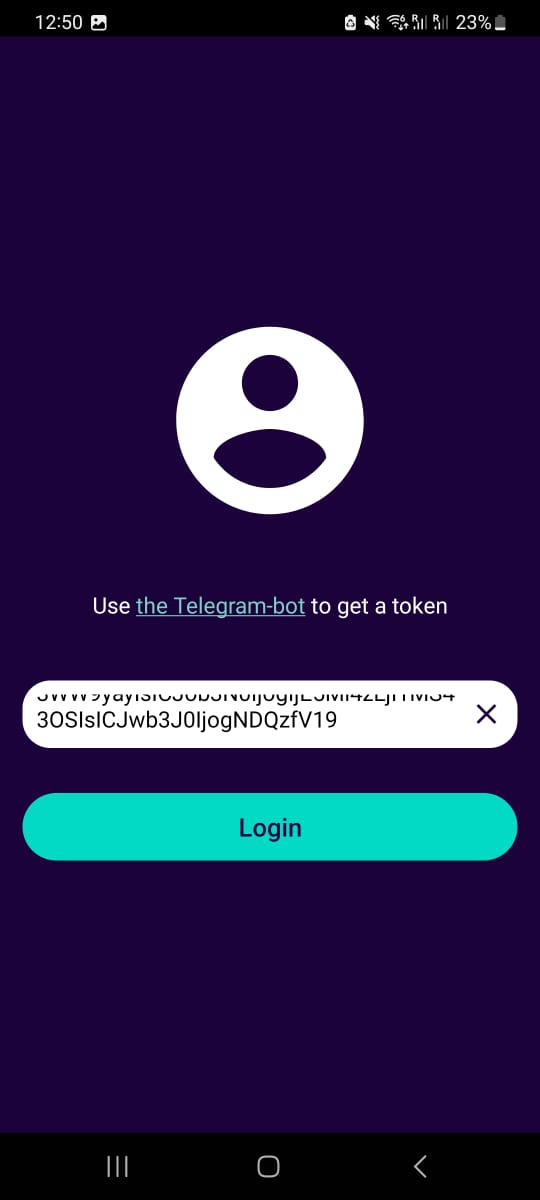
Вставьте токен в соответствующее поле.
Войдите в приложение, используя полученный токен.
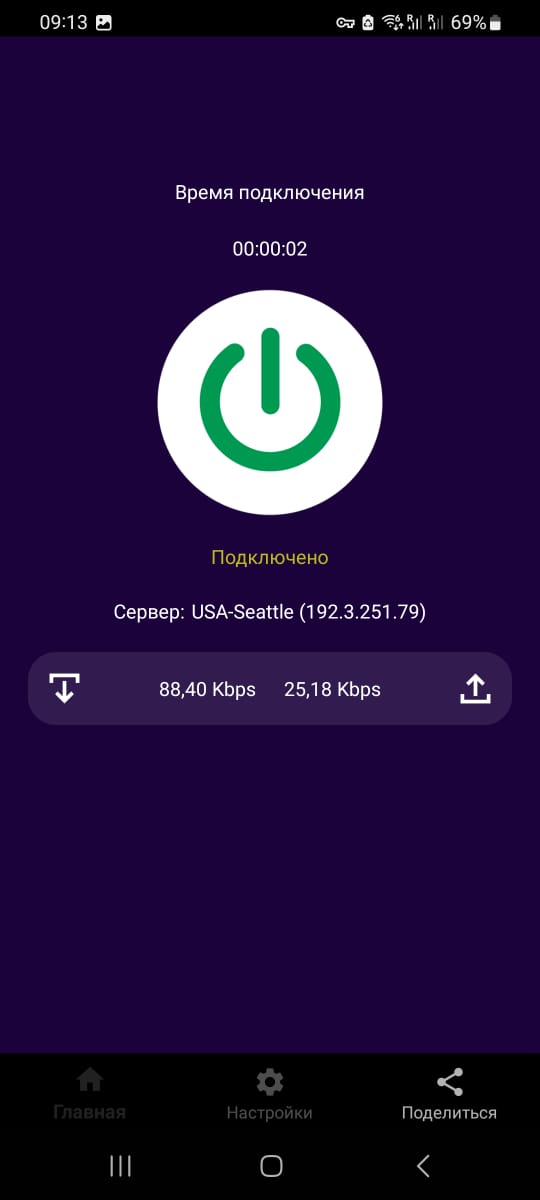
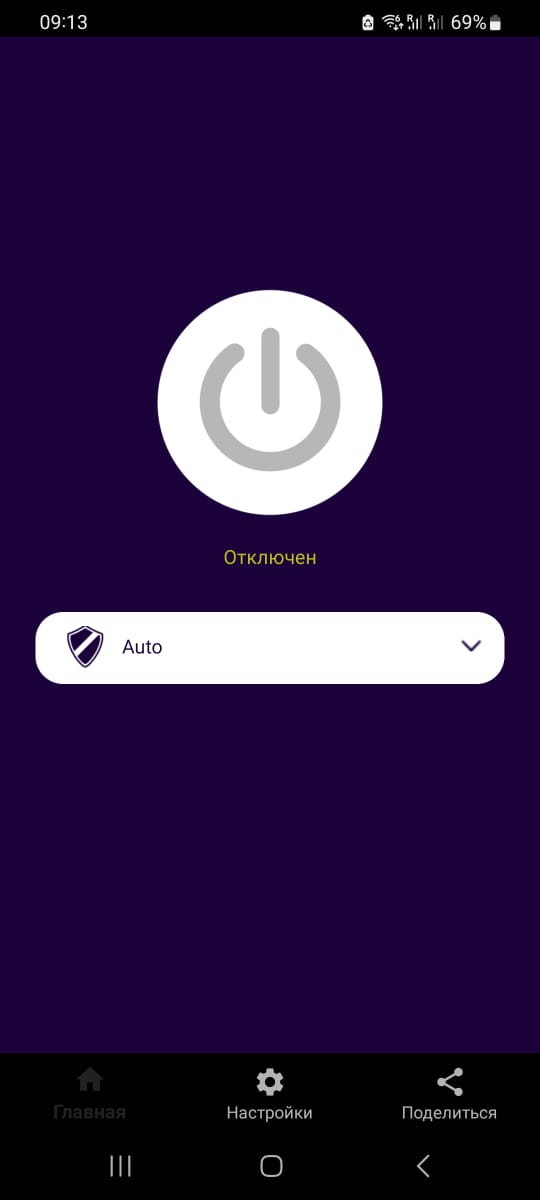
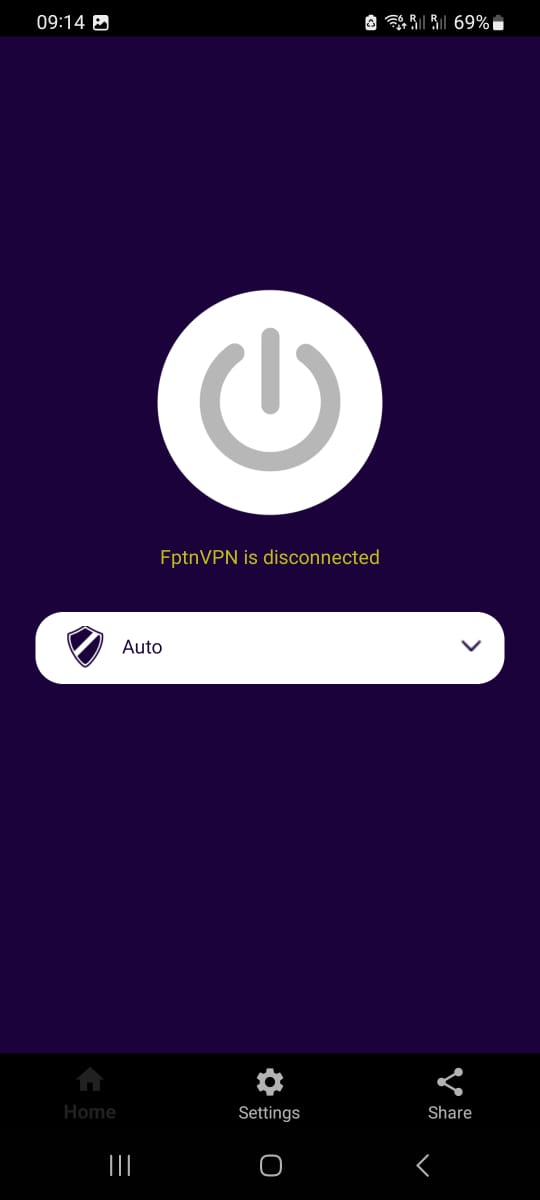
Выберите VPN-сервер из списка доступных (Режим "Авто" подберет наиболее оптимальный сервер или можете выбрать сервер из списка доступных). Для включения VPN-сервиса нажмите на кнопку в центре экрана, которая активирует подключение к выбранному серверу.
Готово!
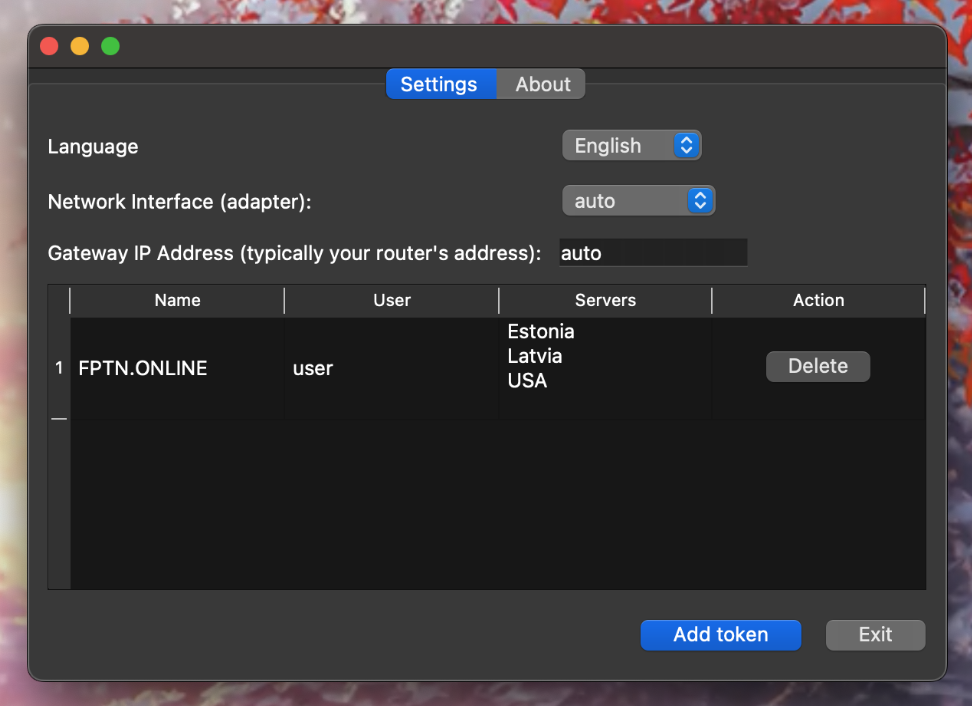
Installation and Setup
Go to the Telegram bot and generate your token by sending the /token command. Then copy the token.
Insert the token into the appropriate field.
Log into the application using the obtained token.
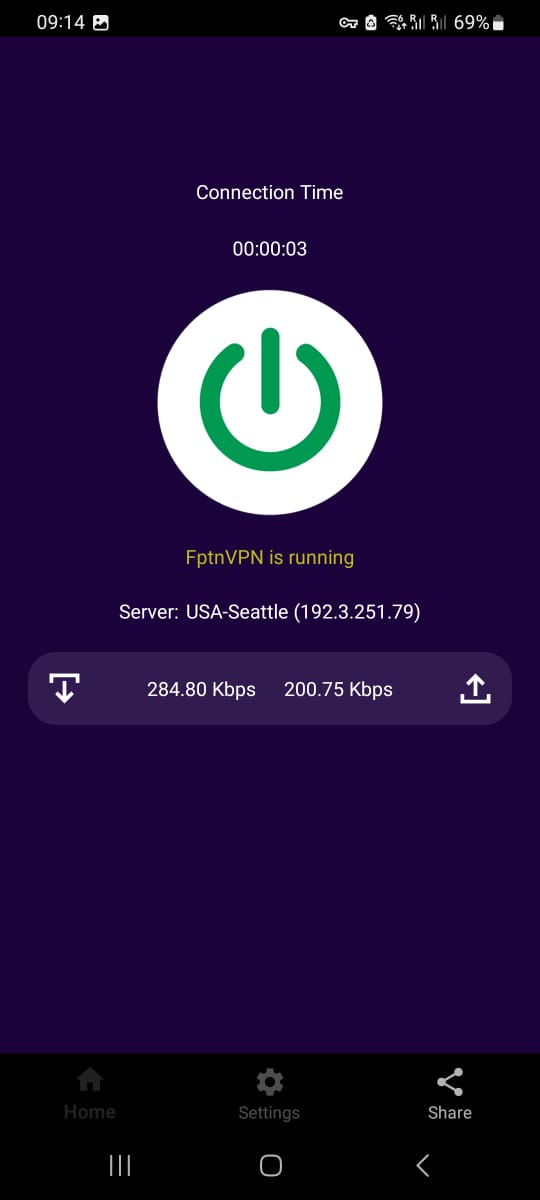
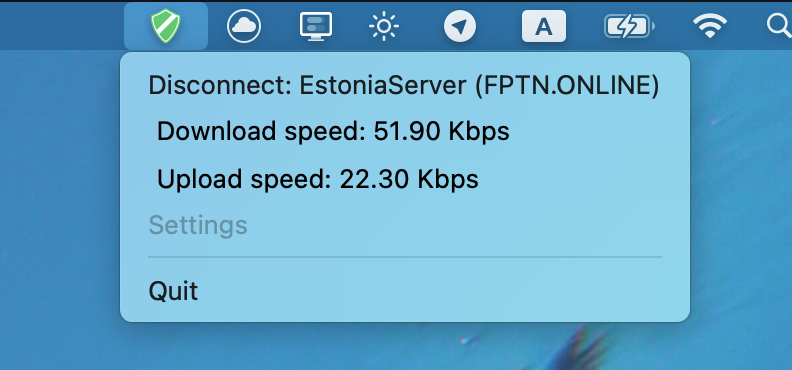
Select a VPN server from the list of available servers (the "Auto" mode will choose the most optimal server, or you can manually select a server from the list). To enable the VPN service, press the button in the center of the screen, which will activate the connection to the selected server.
Done!
Установка и настройка
При установке клиента на MacOS вам может понадобиться более детальная инструкция из-за проблем с драйверами
Перейдите в Telegram-бот и сгенерируйте токен командой /token, затем скопируйте его.
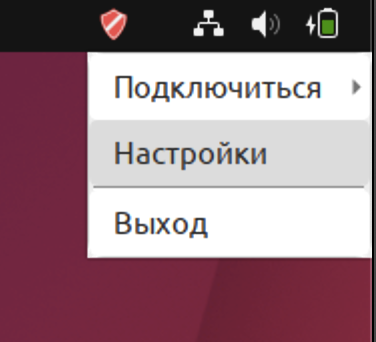
После запуска приложения нажмите на иконку в системном трее чтобы открыть контекстное меню.
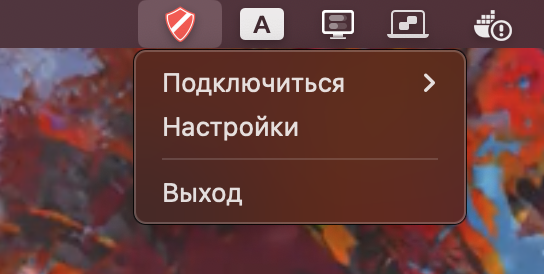
Вставьте сюда токен из Telegram-бота

Сохраните токен.
Закройте окно настроек и попробуйте подключиться

Installation and Setup
When installing the client on macOS, you may need a more detailed guide due to driver-related issues.
Go to the Telegram bot and generate your token by sending the /token command. Then copy the token.
After launching the app, click on the tray icon to open the context menu.
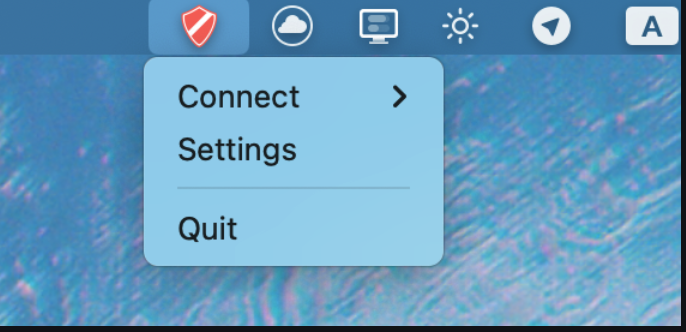
Paste the token you received from the Telegram bot into the token field.
Save the token.
Close the settings window and try connecting.
Download Linux client Скачать Linux клиент
Commandline tools Инструменты командной строки
Установка и настройка
Скачайте .deb пакет FPTN-клиента и установите его вместе со всеми зависимостями, выполнив следующую команду (не забудьте заменить путь до пакета):
sudo apt install -f ~/Downloads/path-to-deb
Перейдите в Telegram-бот и сгенерируйте токен командой /token, затем скопируйте его.
Запустите FPTN-клиент.
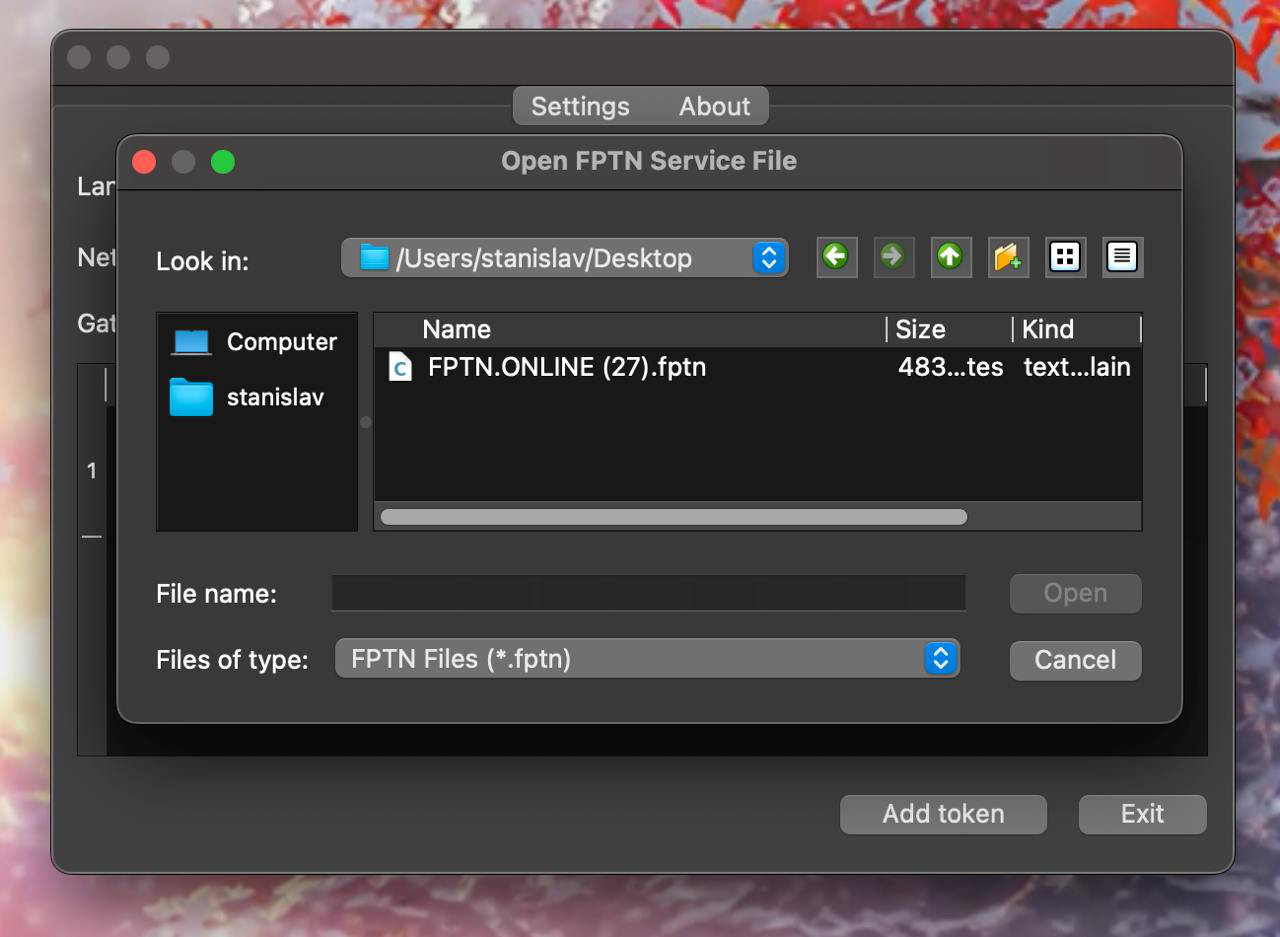
![]()
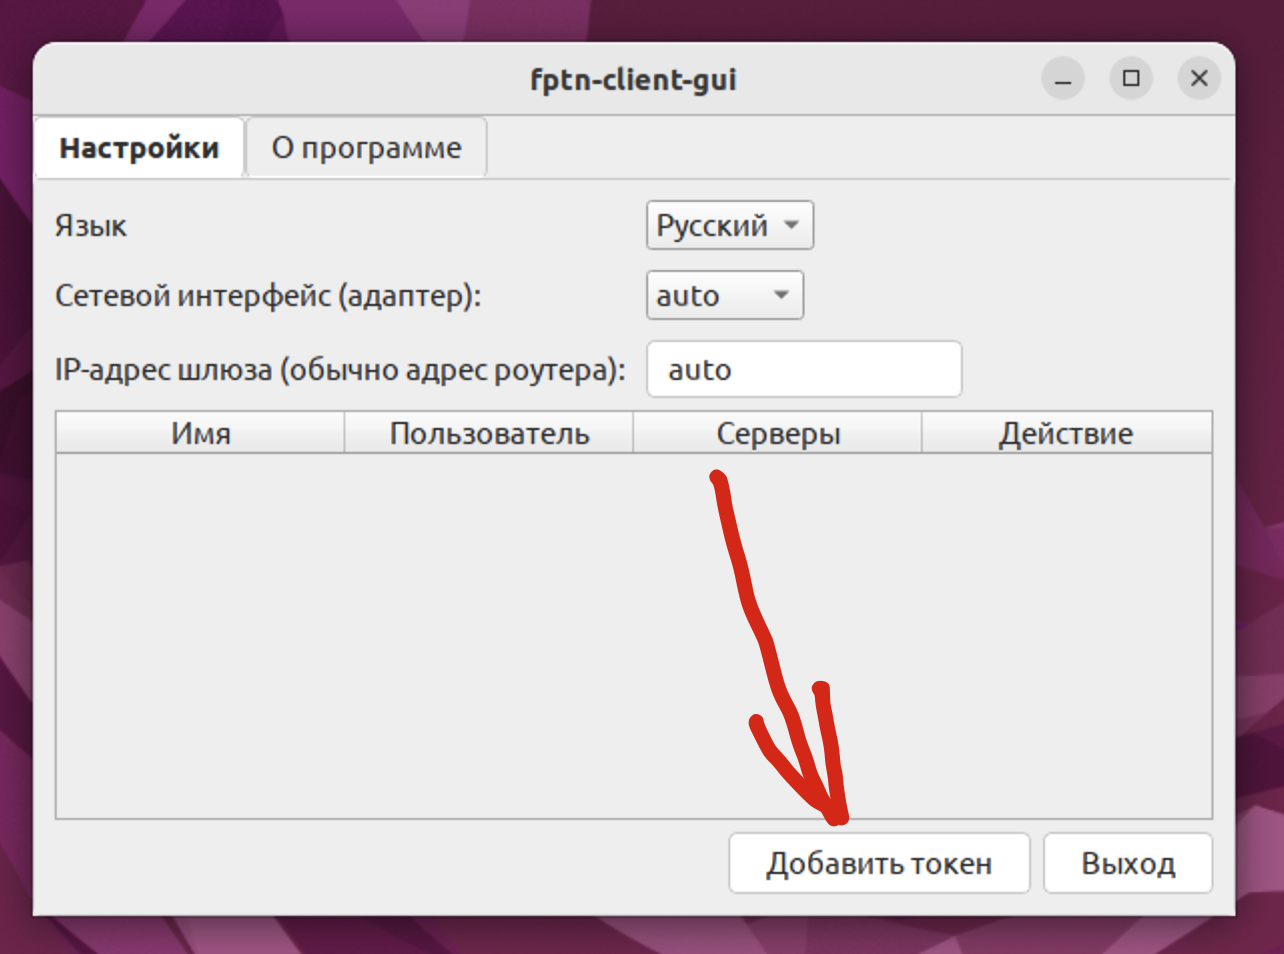
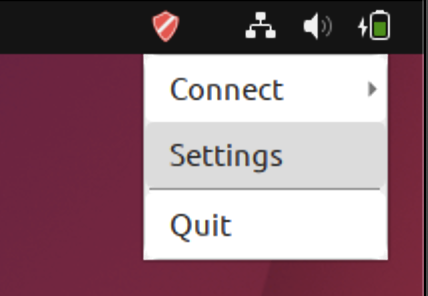
Нажмите на иконку FPTN-клиента в системном трее, чтобы открыть контекстное меню.
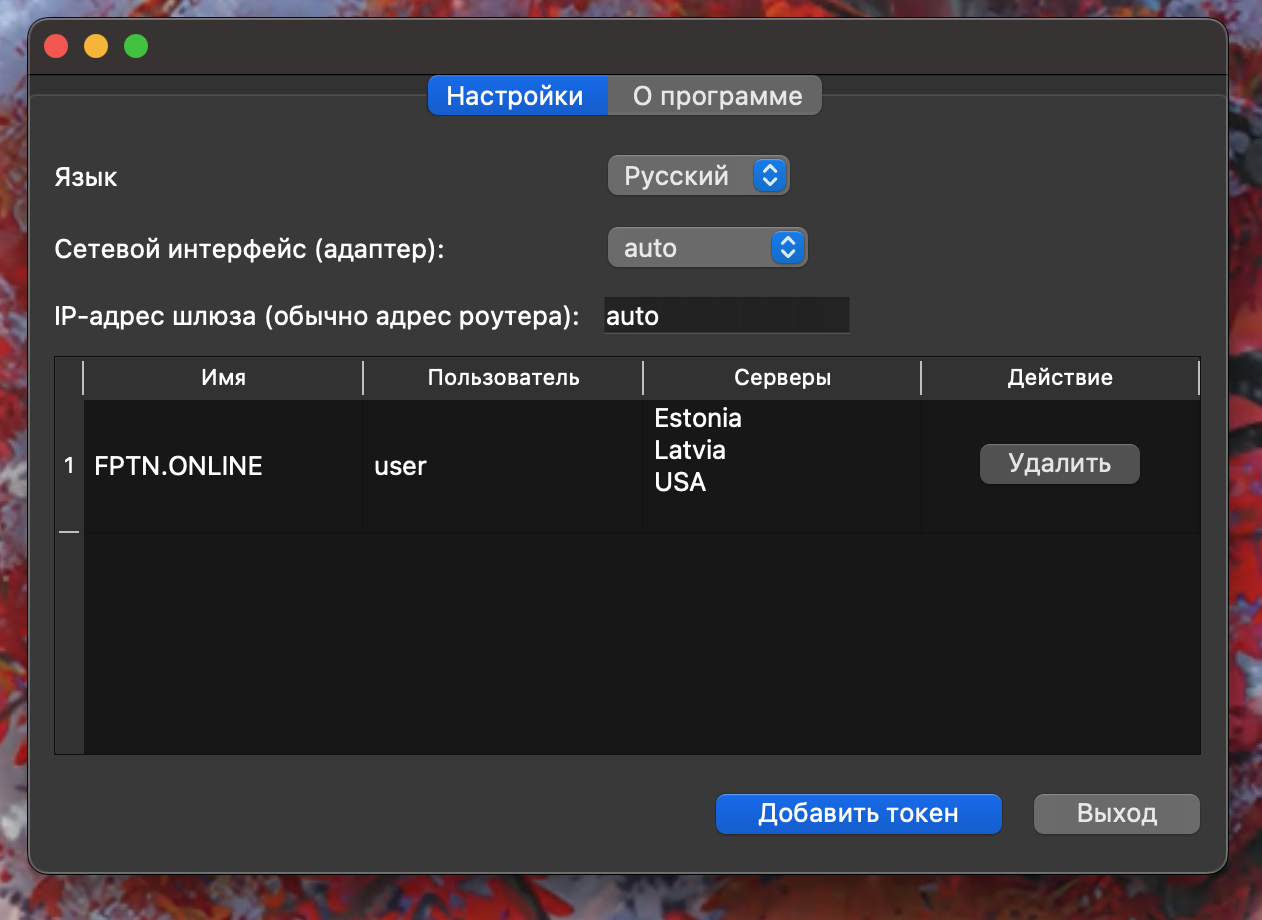
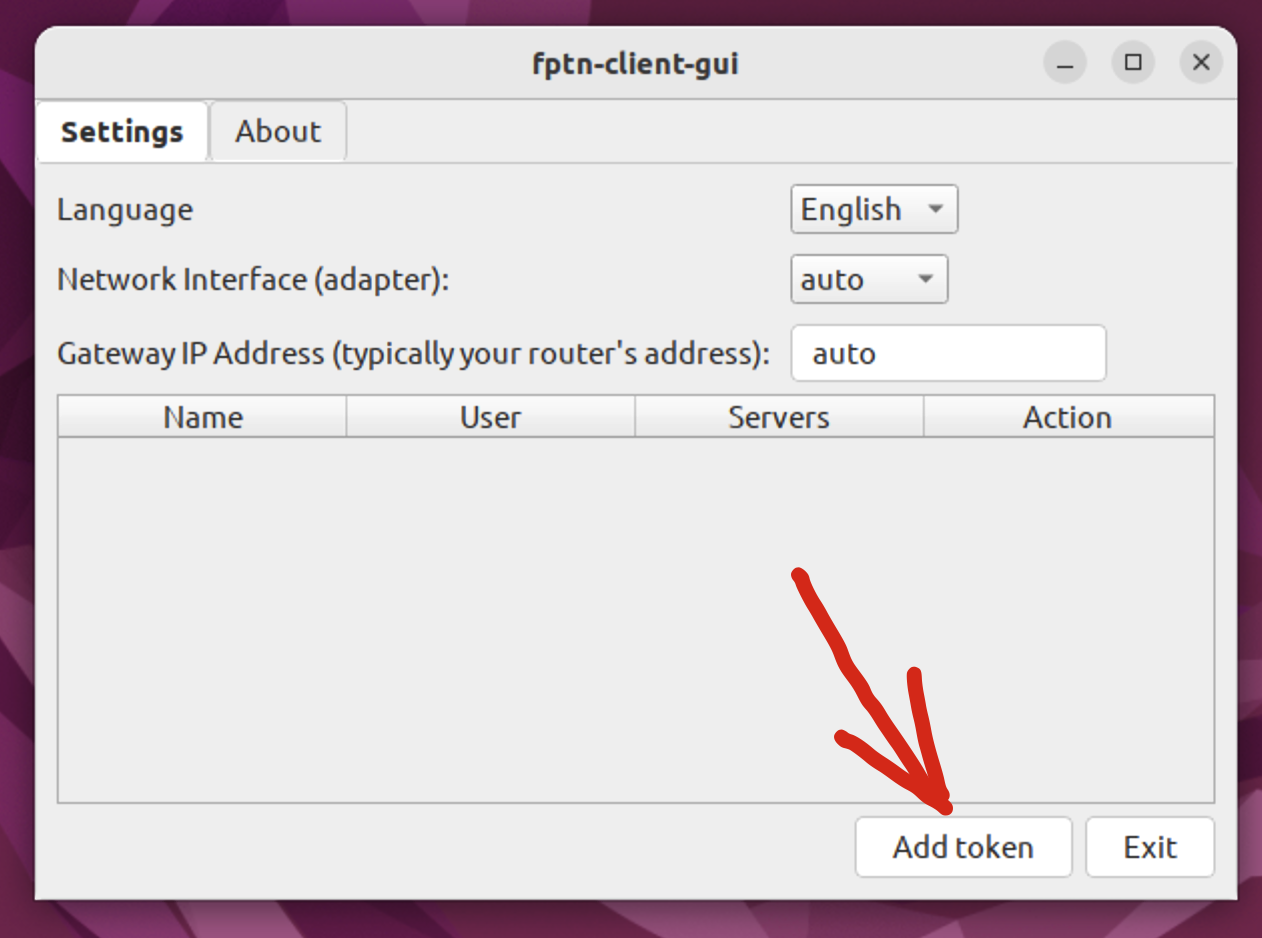
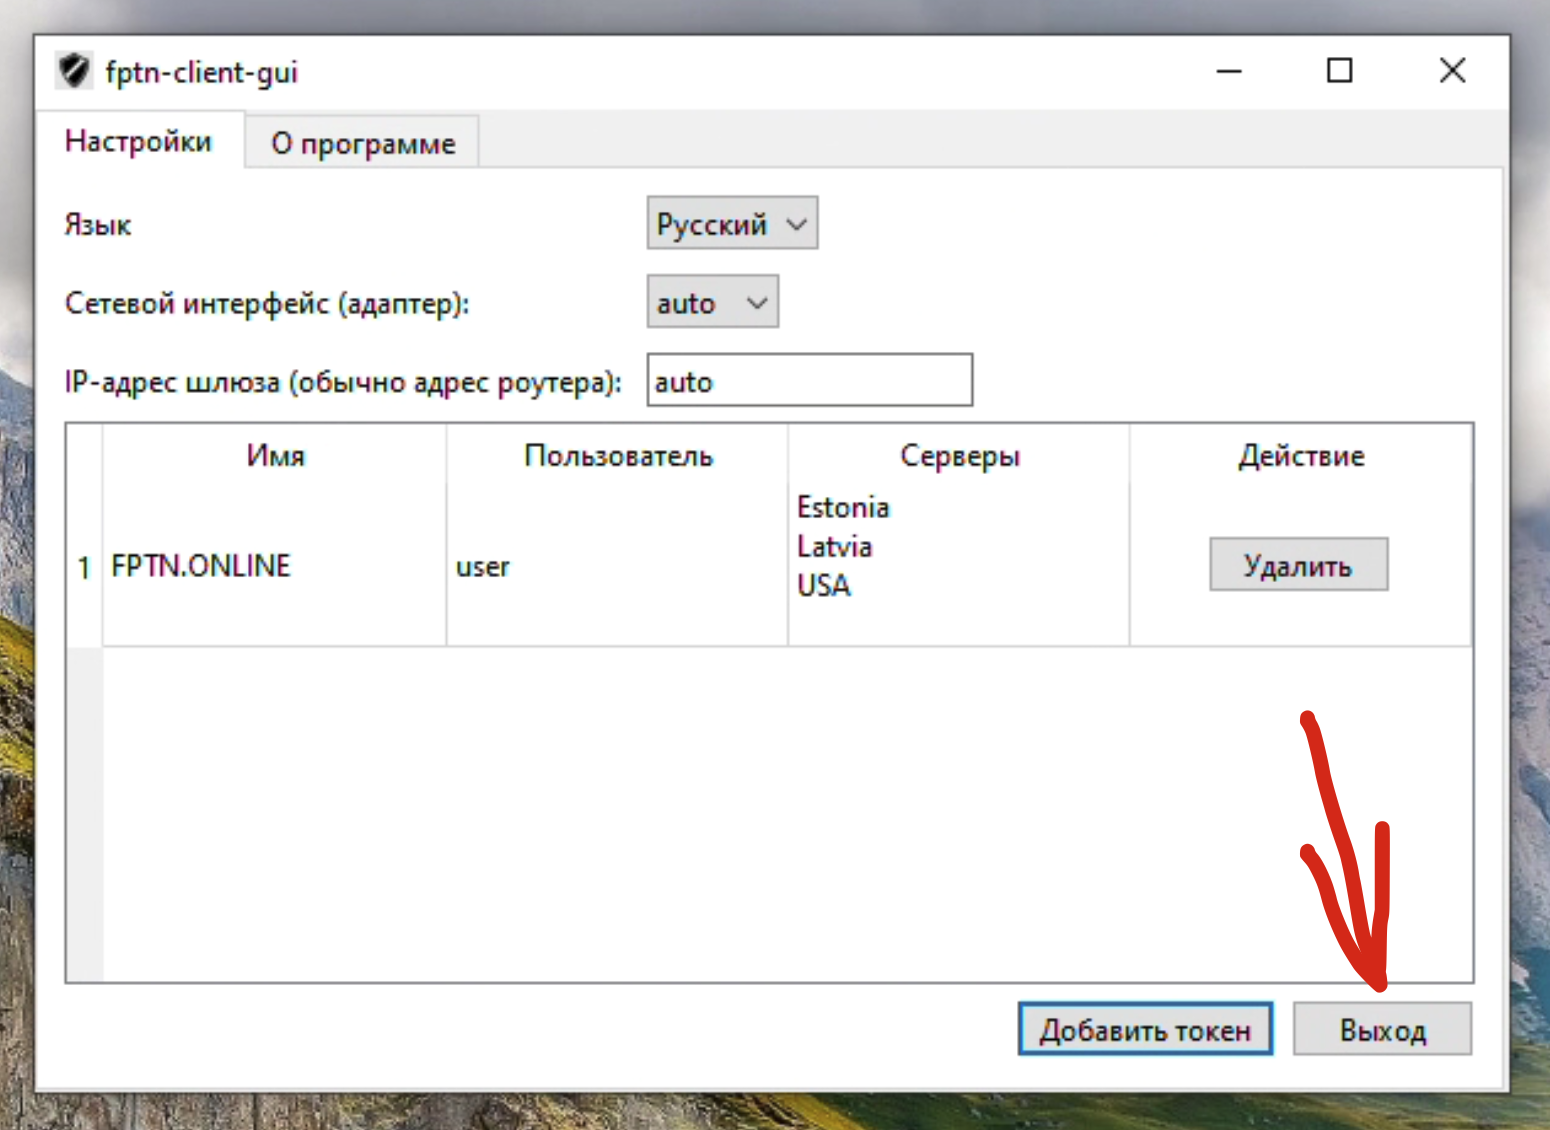
Откройте настройки FPTN-клиента и нажмите кнопку "Добавить токен".
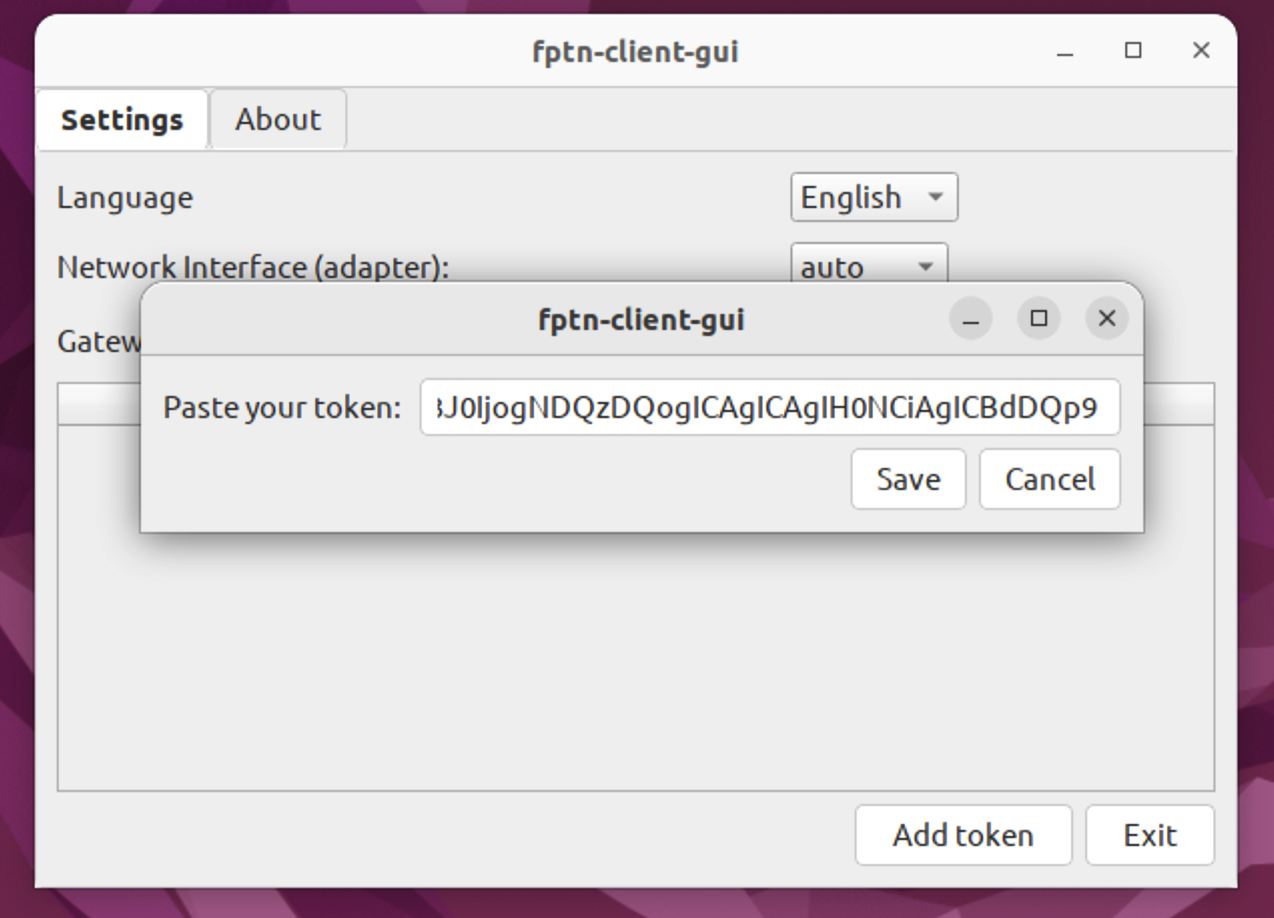
Вставьте сюда токен из Telegram-бота и сохраните
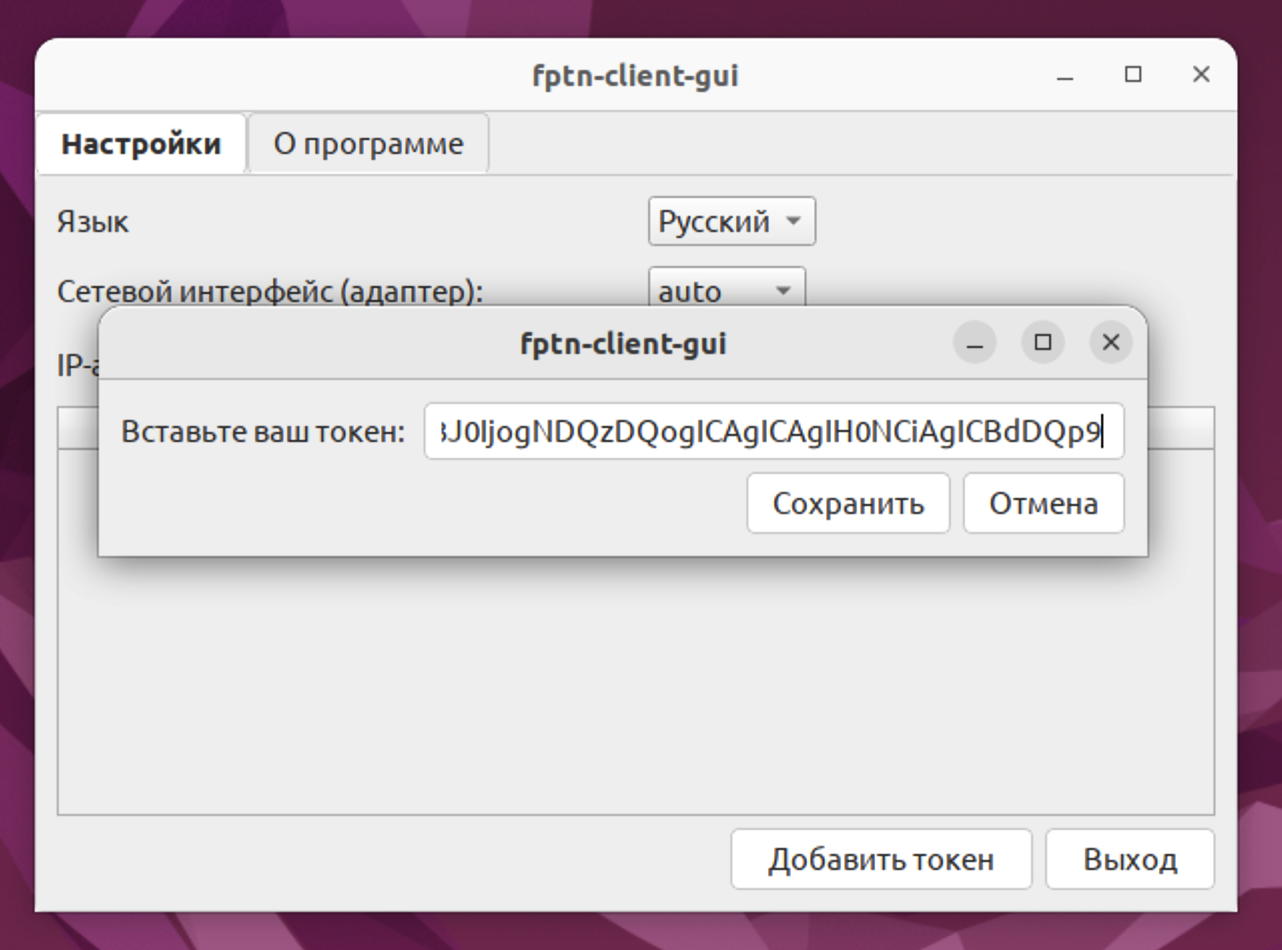
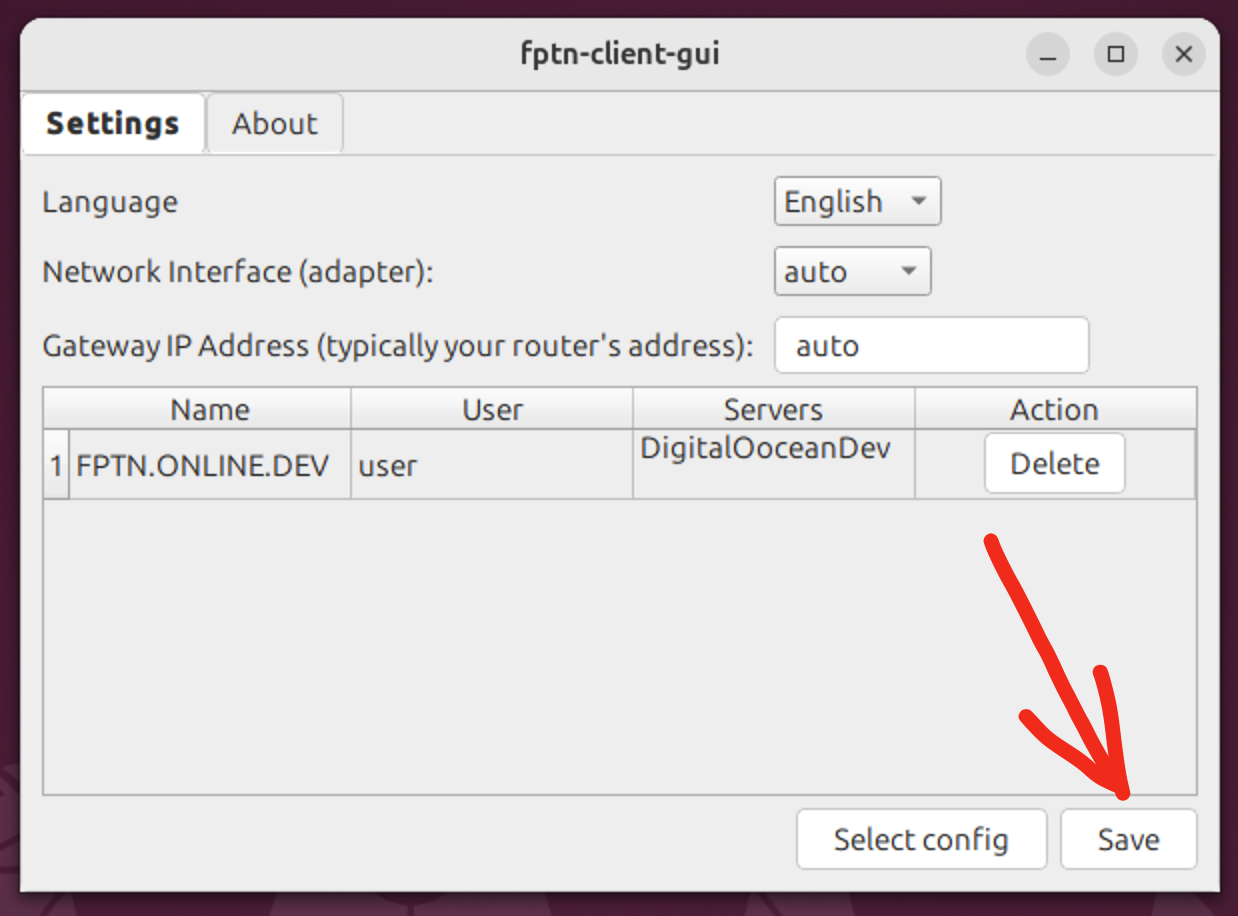
Закройте окно настроек
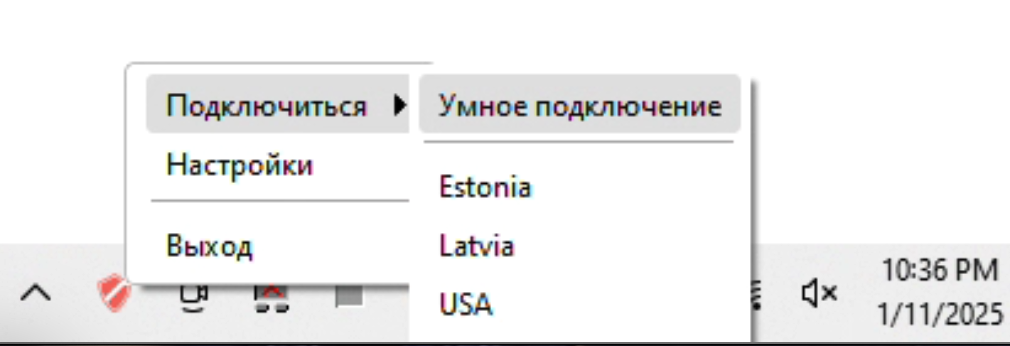
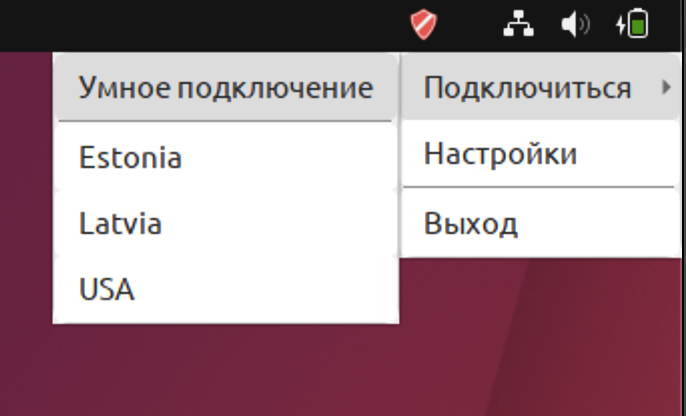
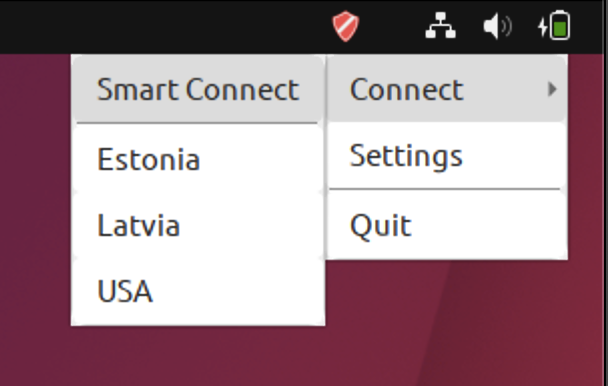
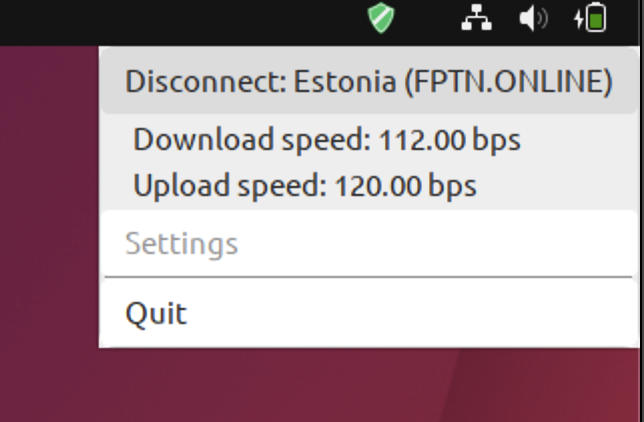
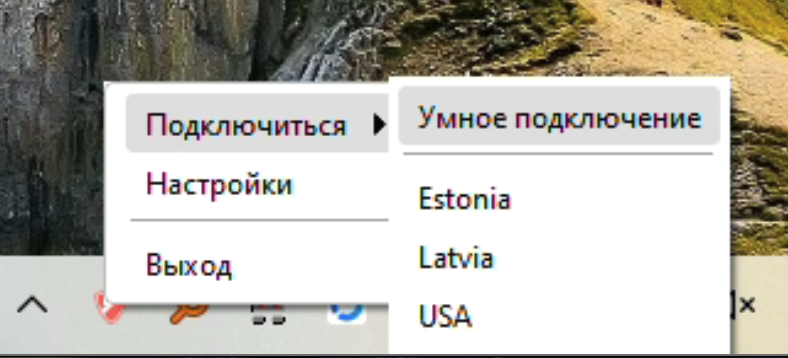
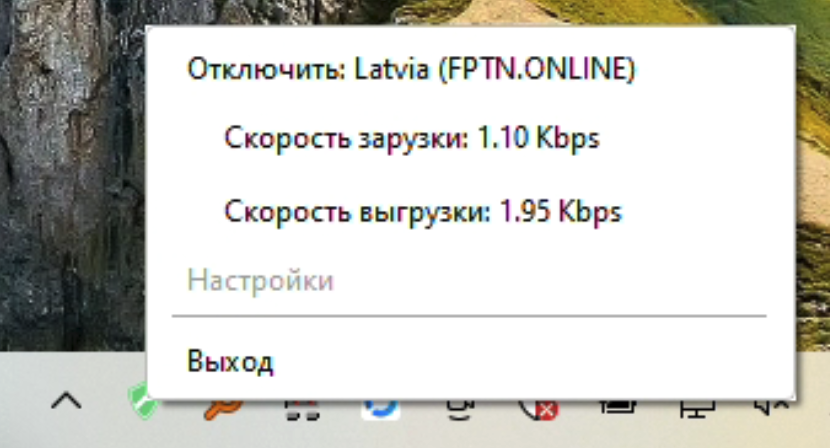
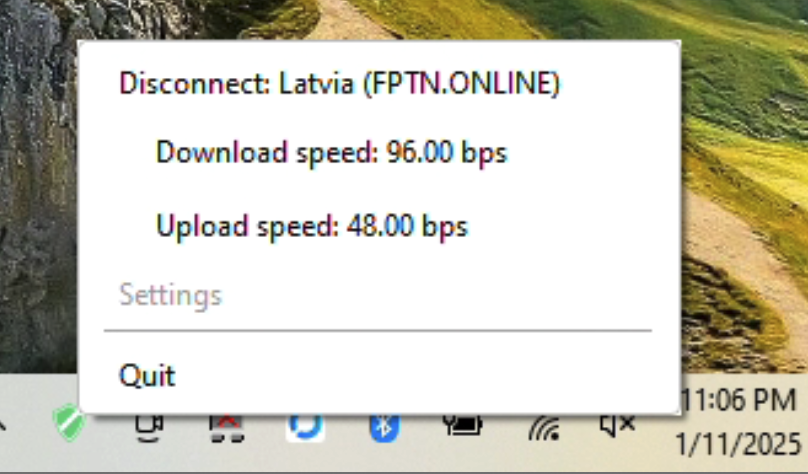
В системном трее кликните по иконке приложения и выберите "Умное подключение". Эта функция автоматически подберет наиболее оптимальный сервер.
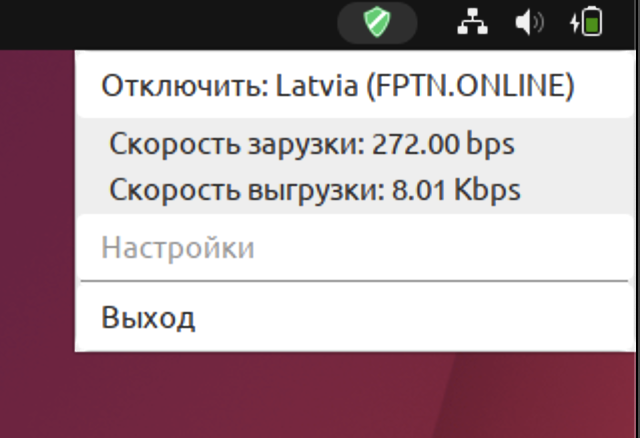
Готово!
Installation and Setup
Download the .deb package for the FPTN client and install it along with all dependencies by running the following command (make sure to replace the package path):
sudo apt install -f ~/Downloads/path-to-deb
Go to the Telegram bot and generate a token by sending the /token command, then copy it.
Launch the FPTN client.
![]()
Click on the FPTN client icon in the system tray to open the context menu.
Open the FPTN client settings and click the "Add token" button.
Paste the token from the Telegram bot here and save it.
Close the settings window.
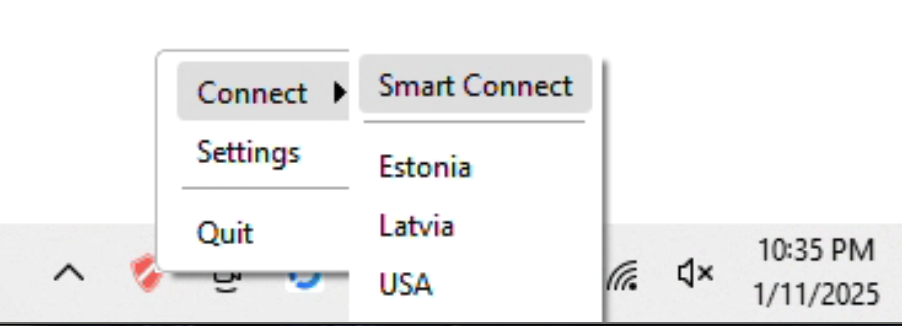
In the system tray, click on the application icon and select "Smart Connection". This feature will automatically select the most optimal server.
Done!
Download the client for Windows (supports Windows 10 and Windows 11, x86_64 architecture) Скачать клиент для Windows (поддерживаются Windows 10 и Windows 11, архитектура x86_64)
Установка и настройка
Перейдите в Telegram-бот и сгенерируйте токен командой /token, затем скопируйте его.
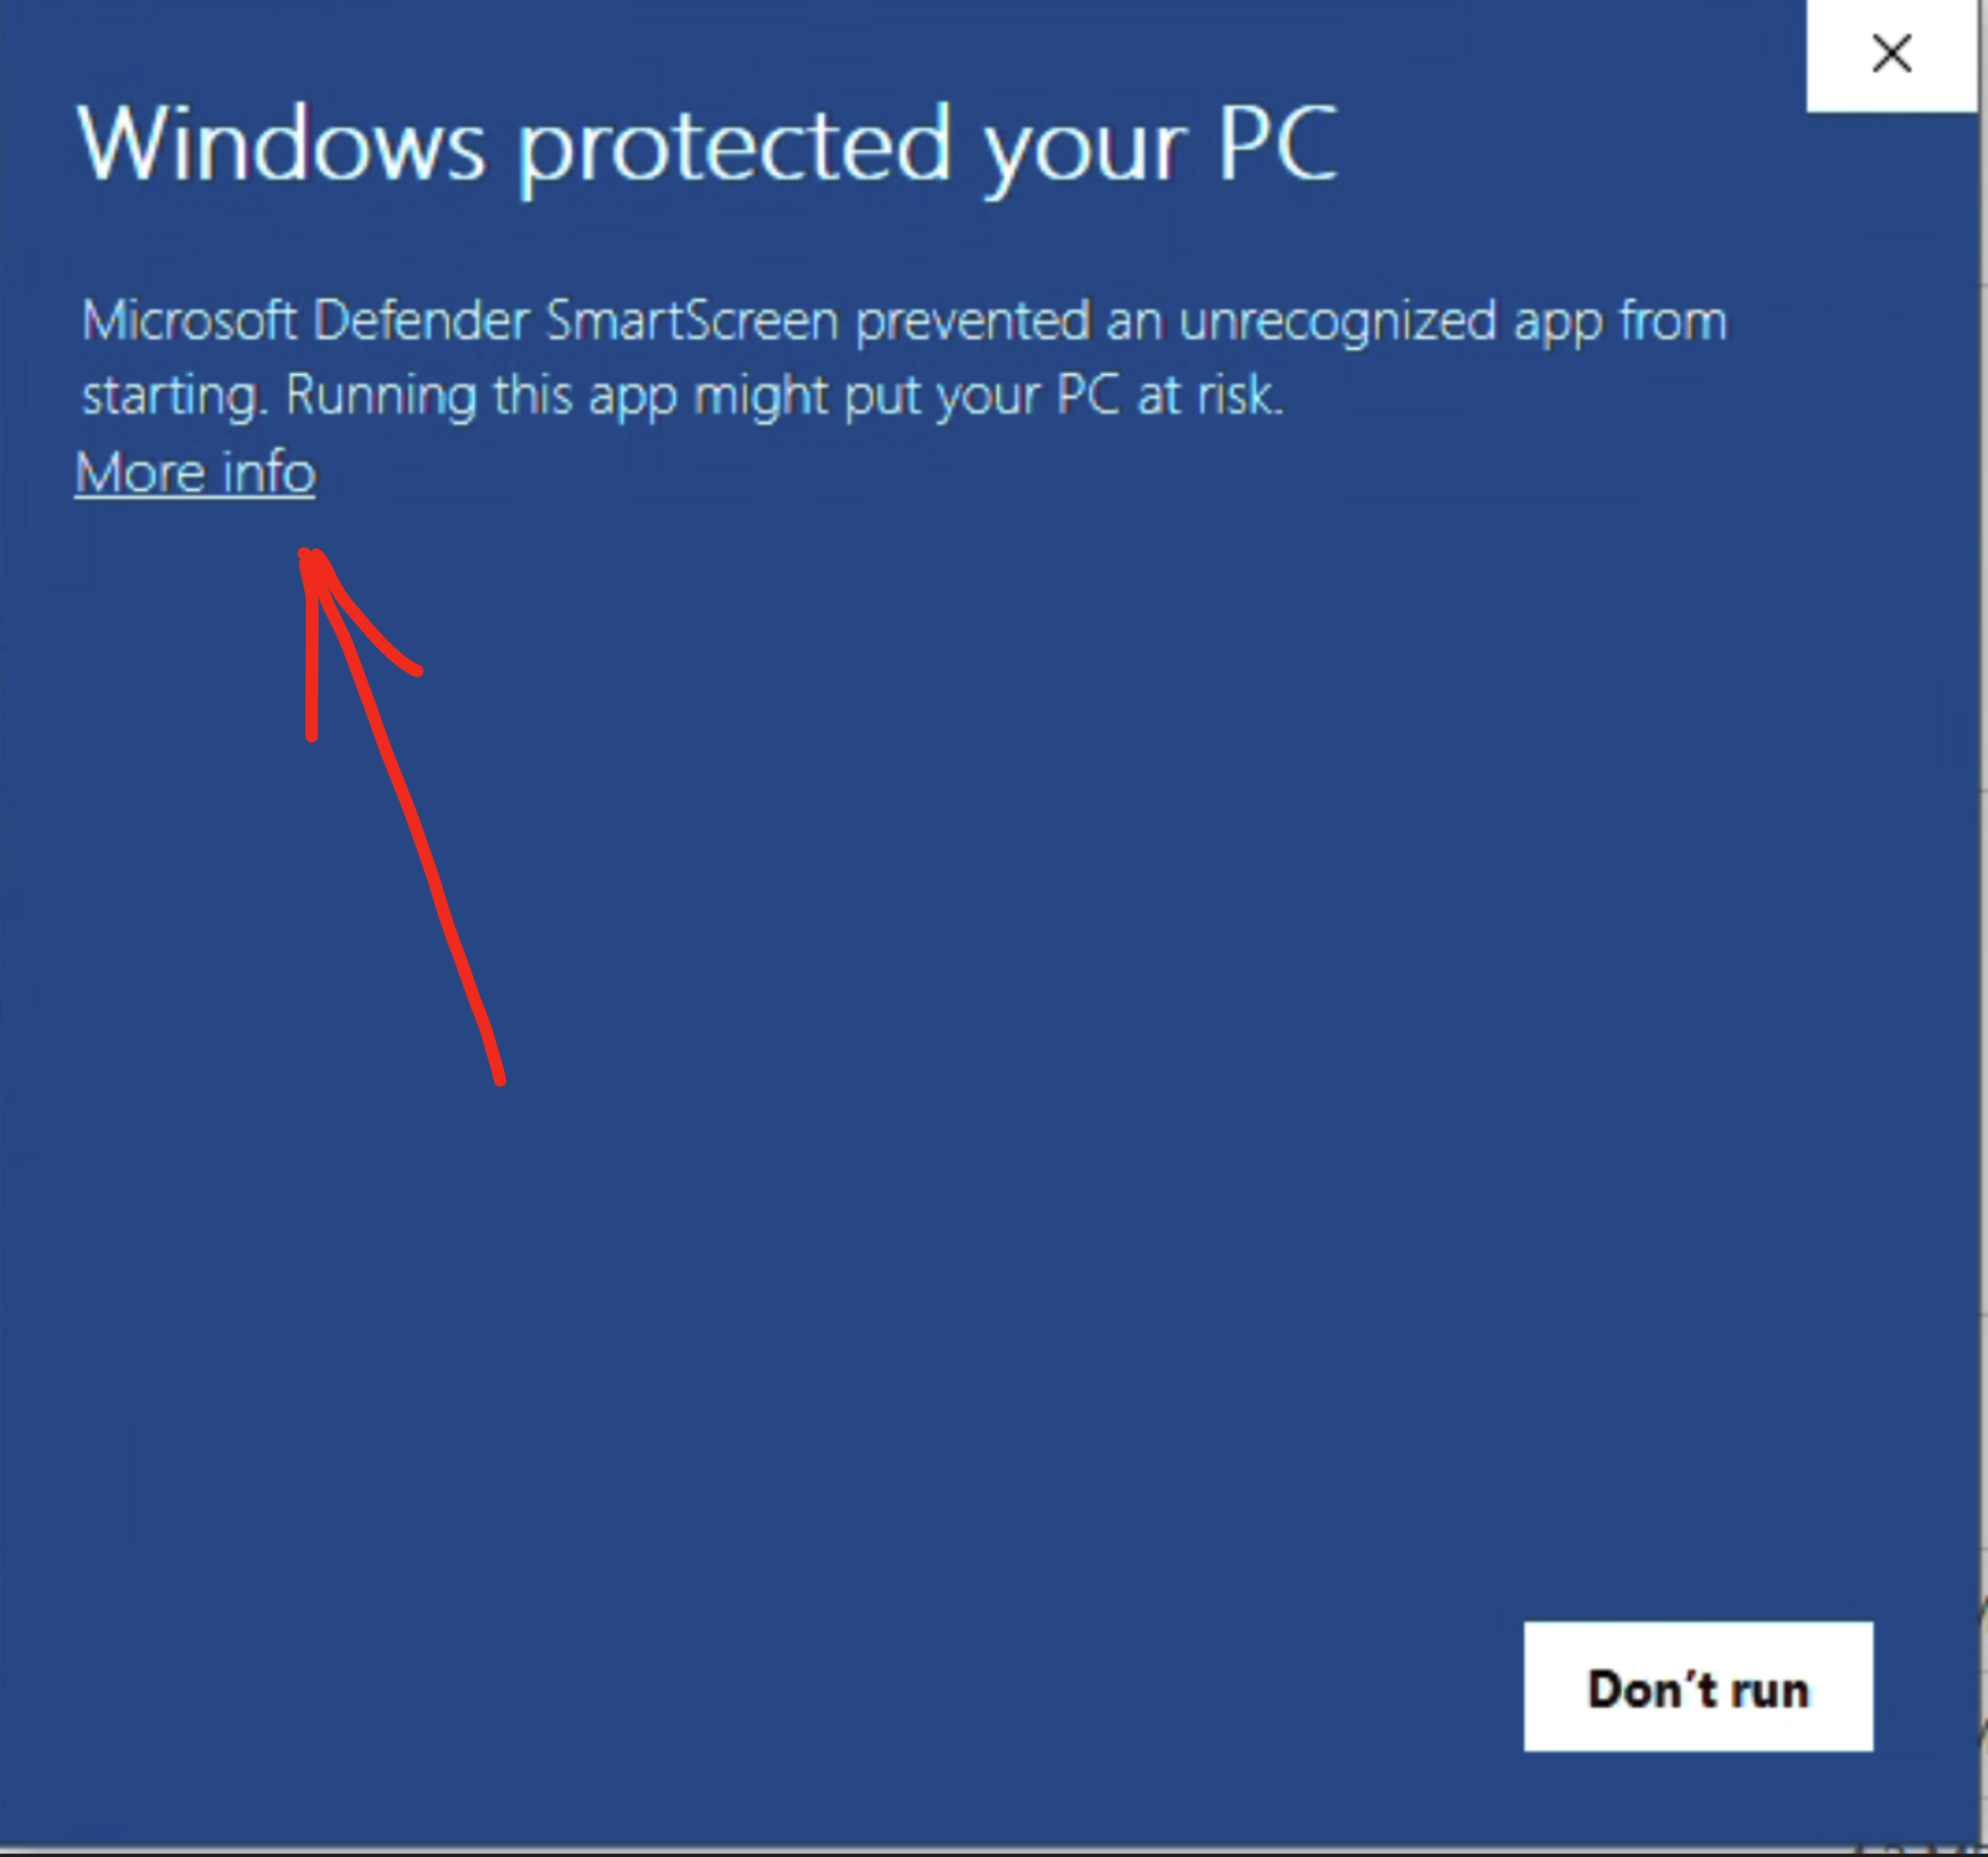
Скачайте и запустите установщик. При запуске установщика, Windows покажет окно с предупреждением, нажмите "подробнее".
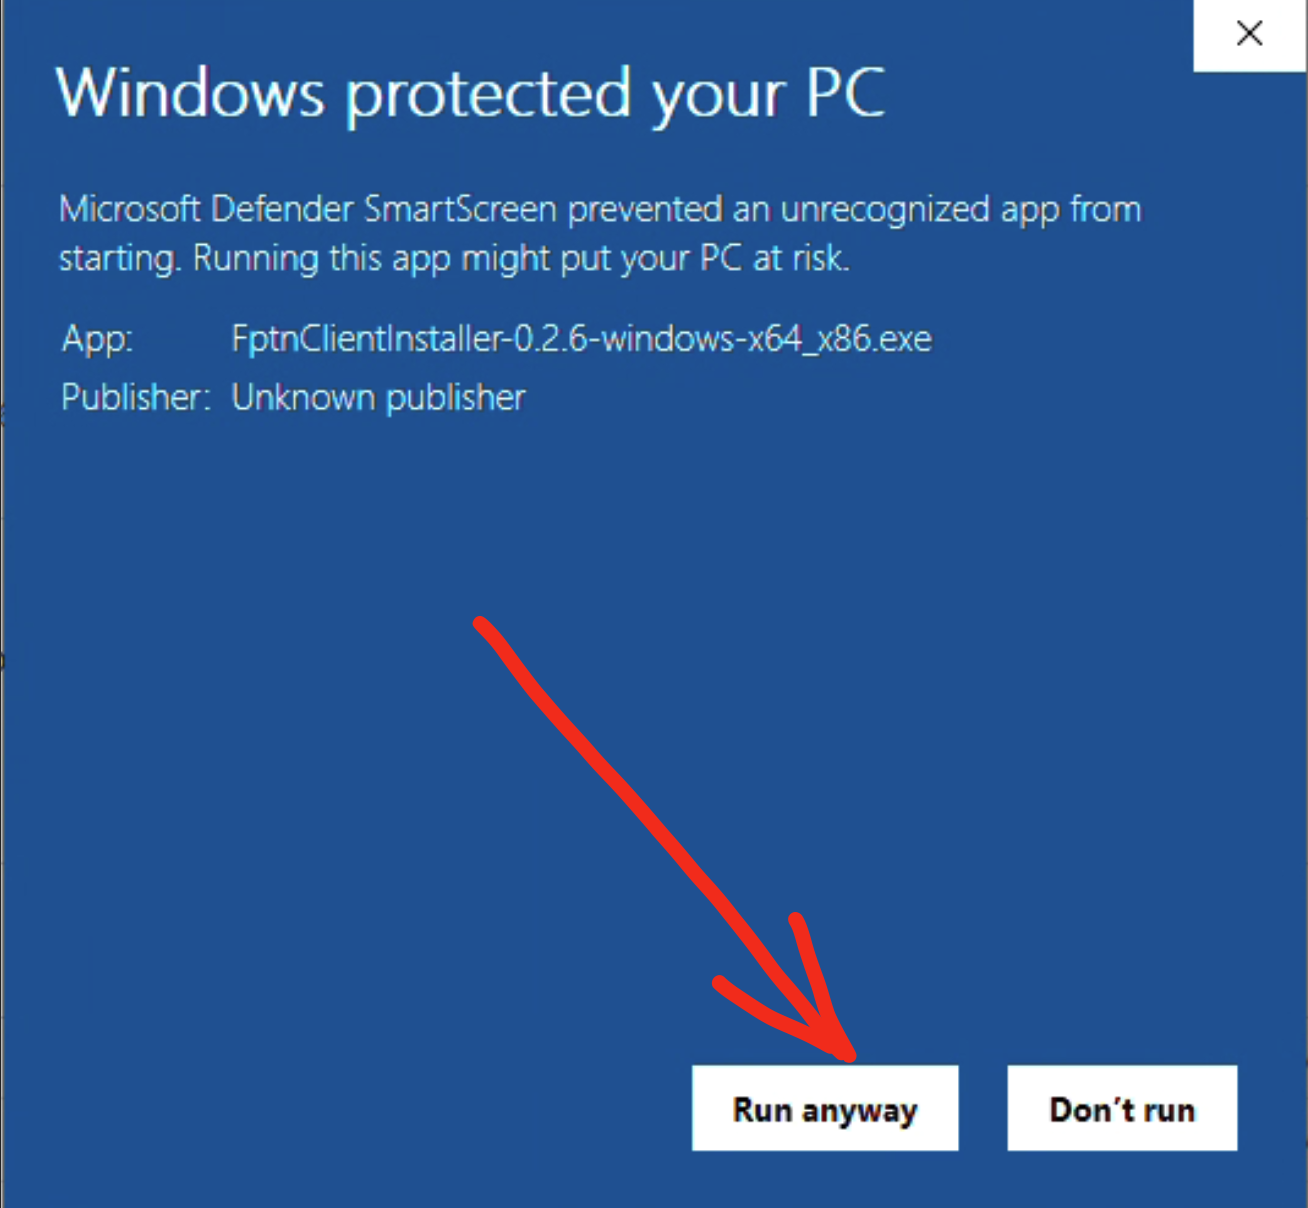
 И нажмите на кнопку "Запустить в любом случае".
 После чего подтвердите запуск установщика.
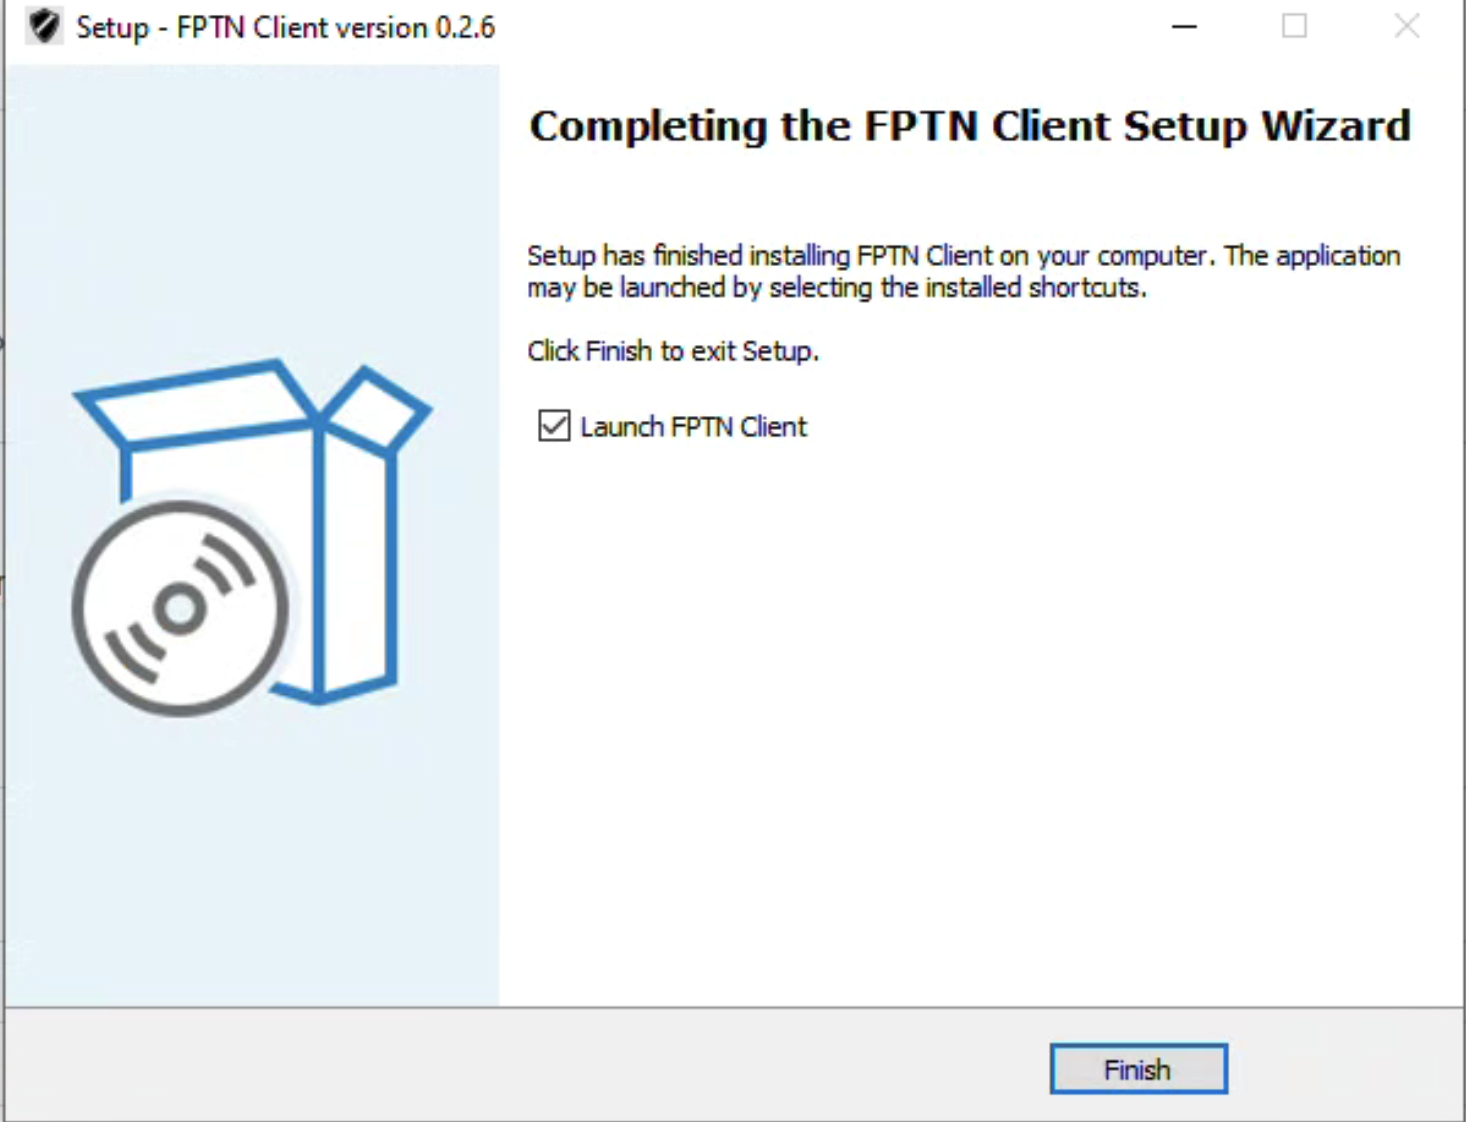
 После завершения установки нажмите кнопку завершить и приложение запустится автоматически.
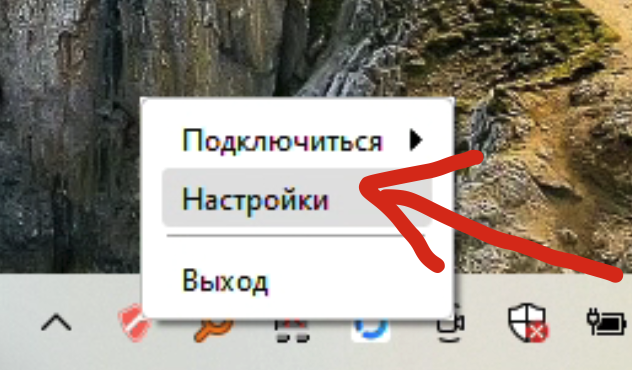
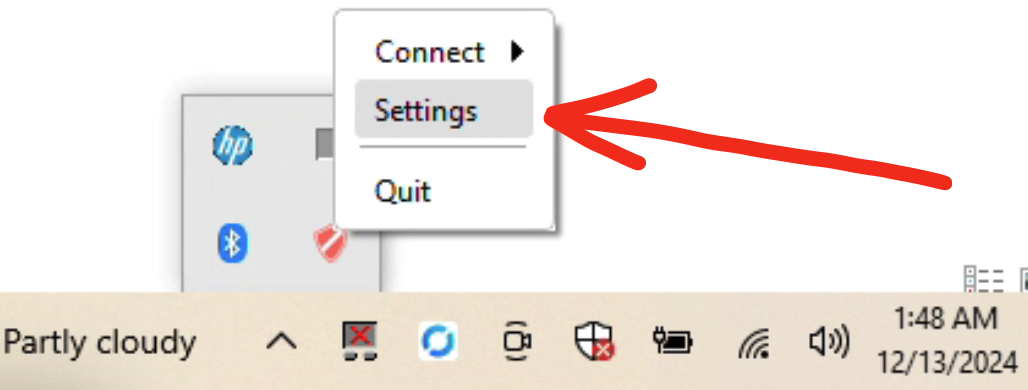
 После запуска клиента в системном трее появится иконка приложения. Кликните по иконке и откройте настройки.
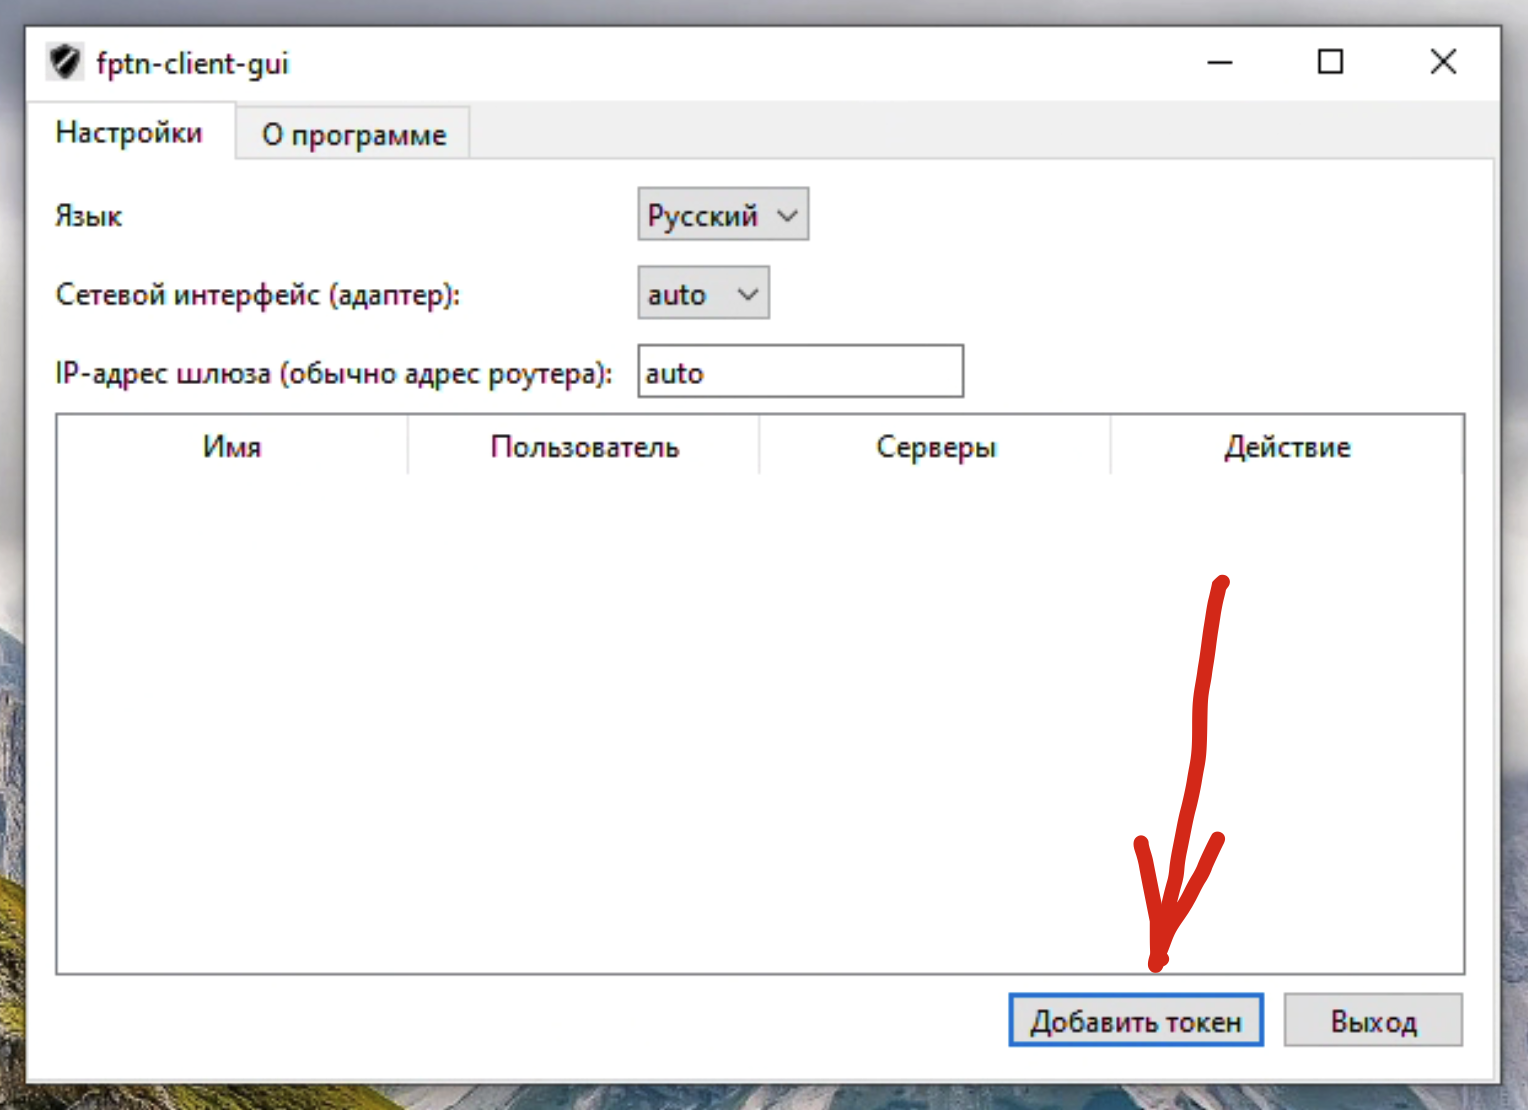
Нажмите кнопку "Добавить токен".
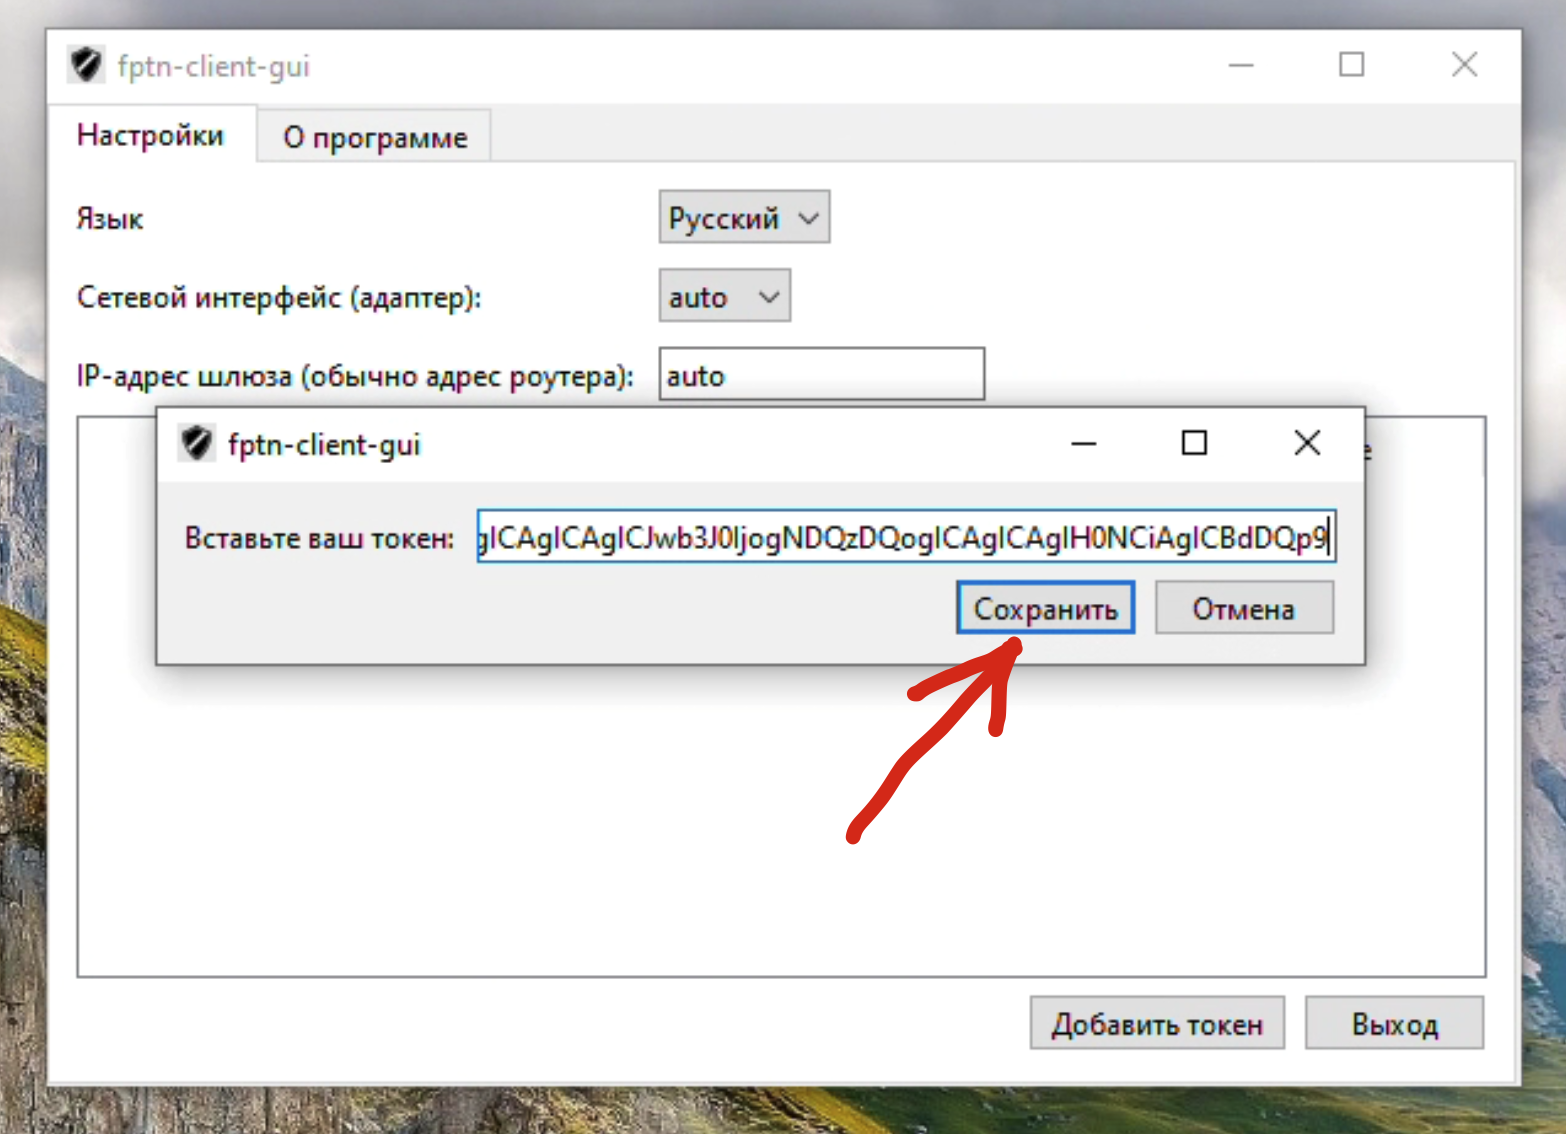
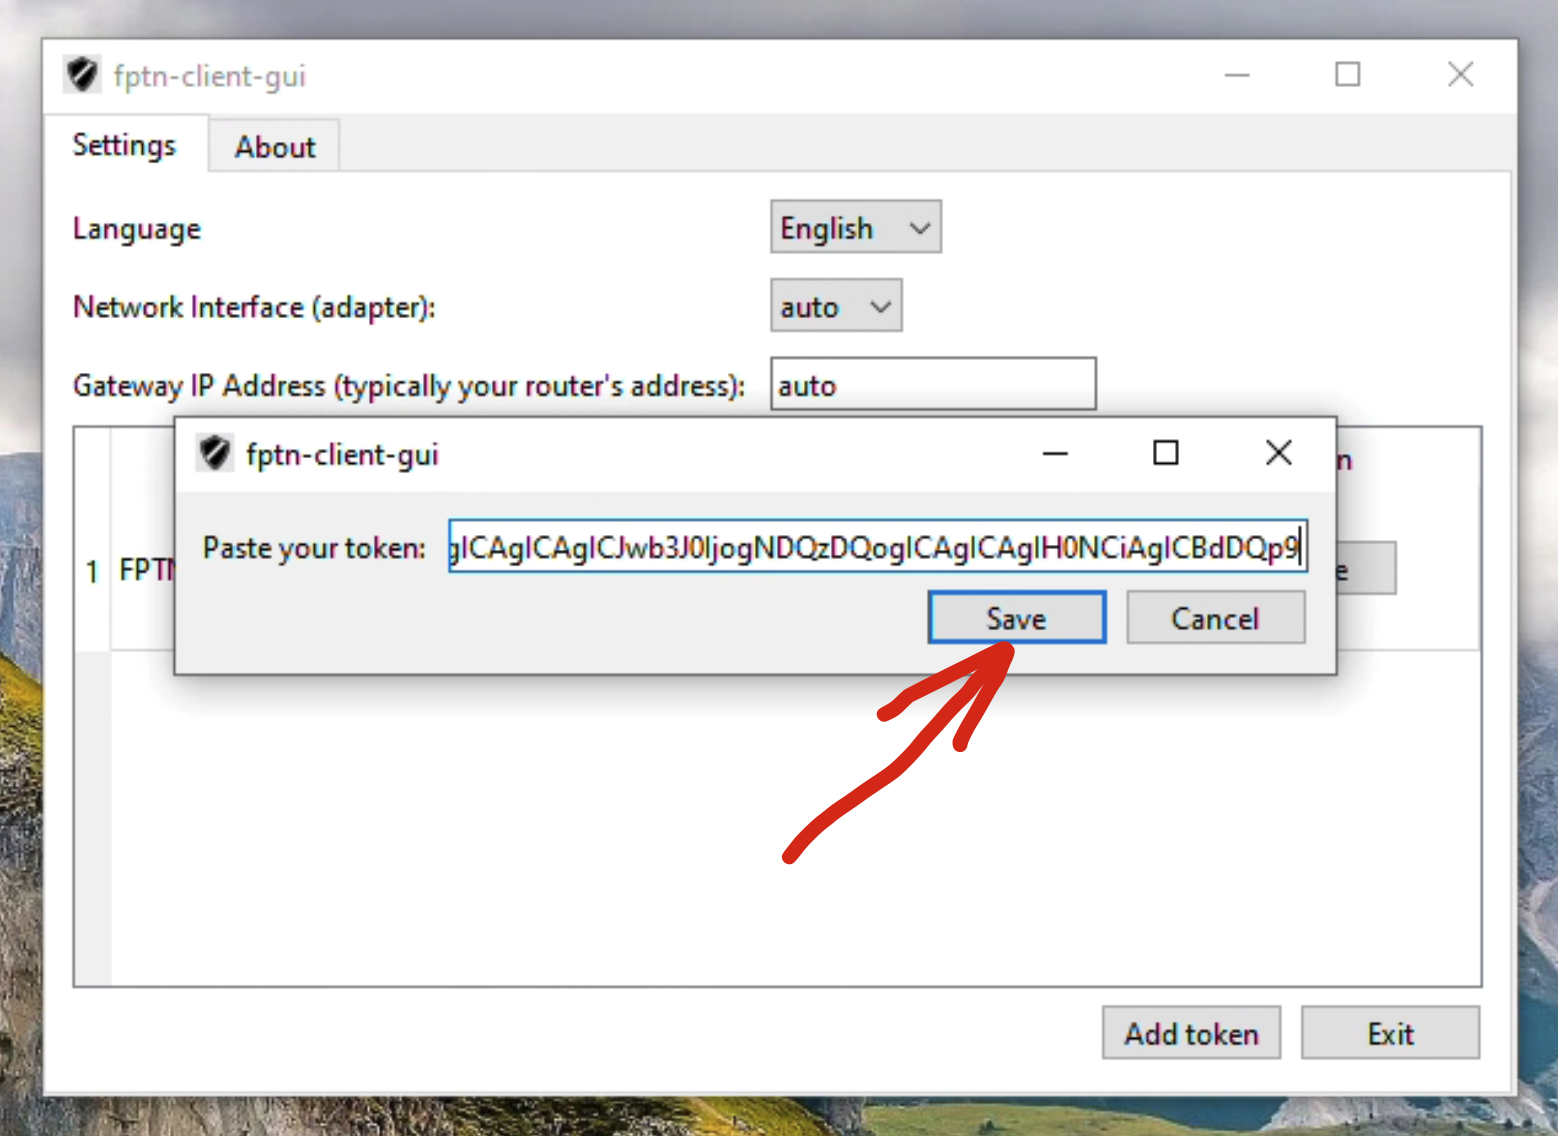
Вставьте сюда токен из Telegram-бота и сохраните
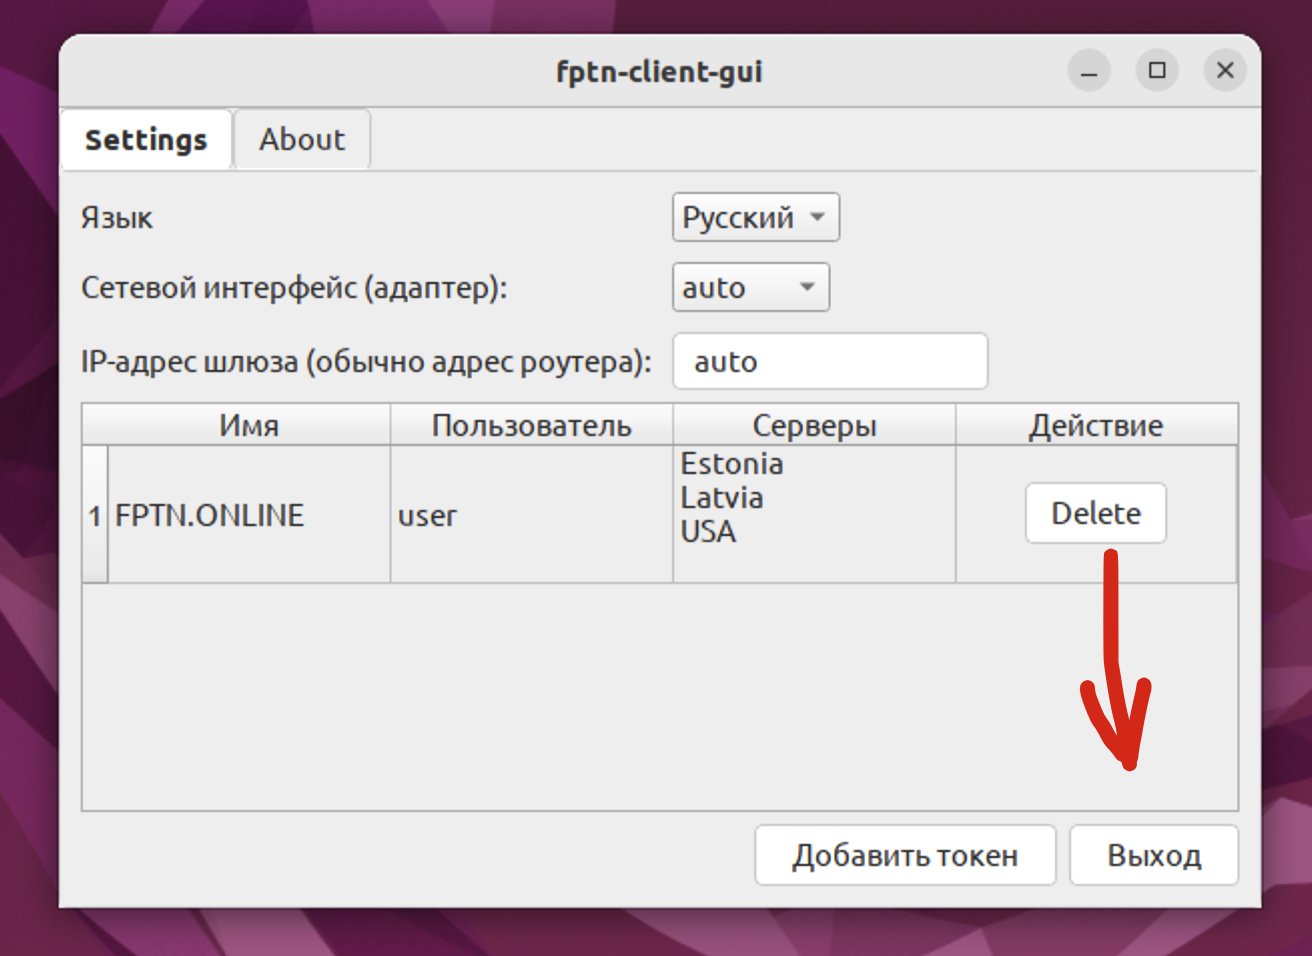
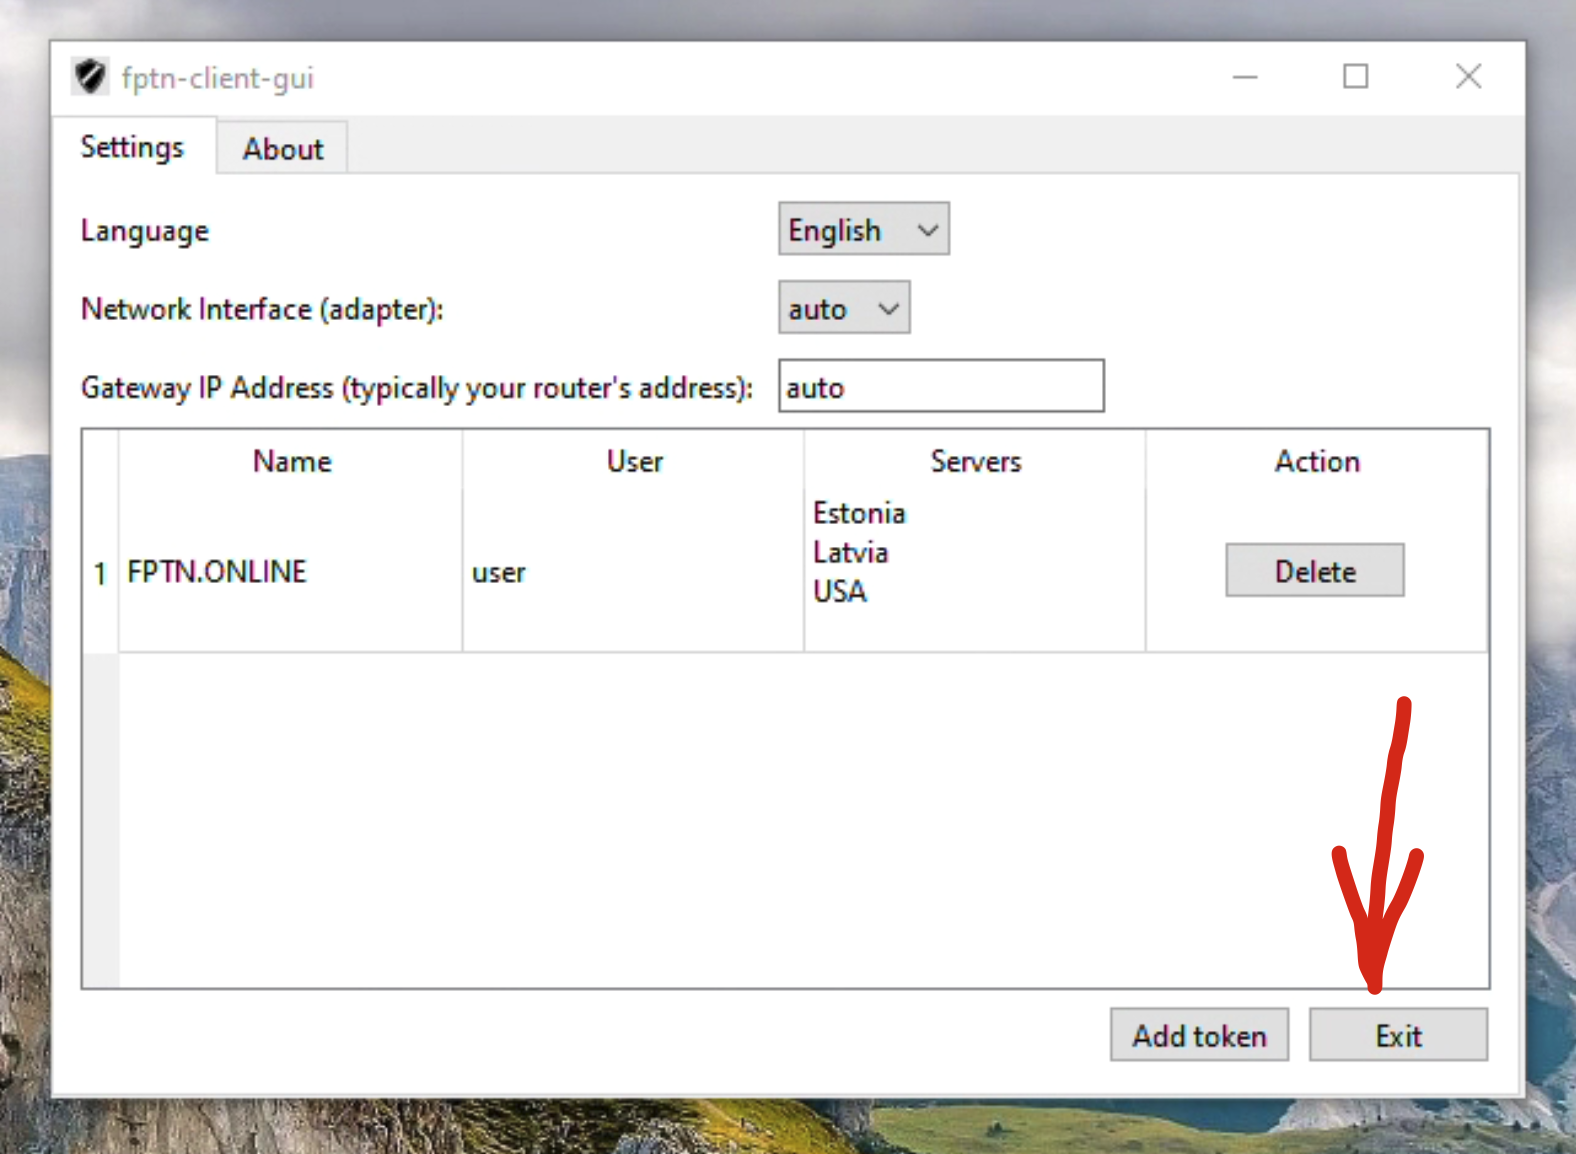
После открытия появится список доступных серверов, далее нужно просто закрыть окно настроек.
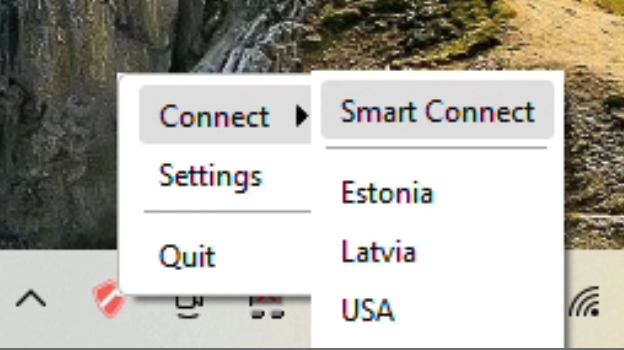
В системном трее кликните по иконке приложения и выберите "Умное подключение". "Умное подключение" подберет наиболее оптимальный сервер.
Готово!
Installation and Setup
Go to the Telegram bot and generate a token by sending the /token command, then copy it.
Then click "Run anyway".
Confirm the installer launch.
After the installation is complete, click the finish button, and the application will launch automatically.
After the client launches, the application icon will appear in the system tray. Click on the icon and open the settings.
Click the "Add Token" button.
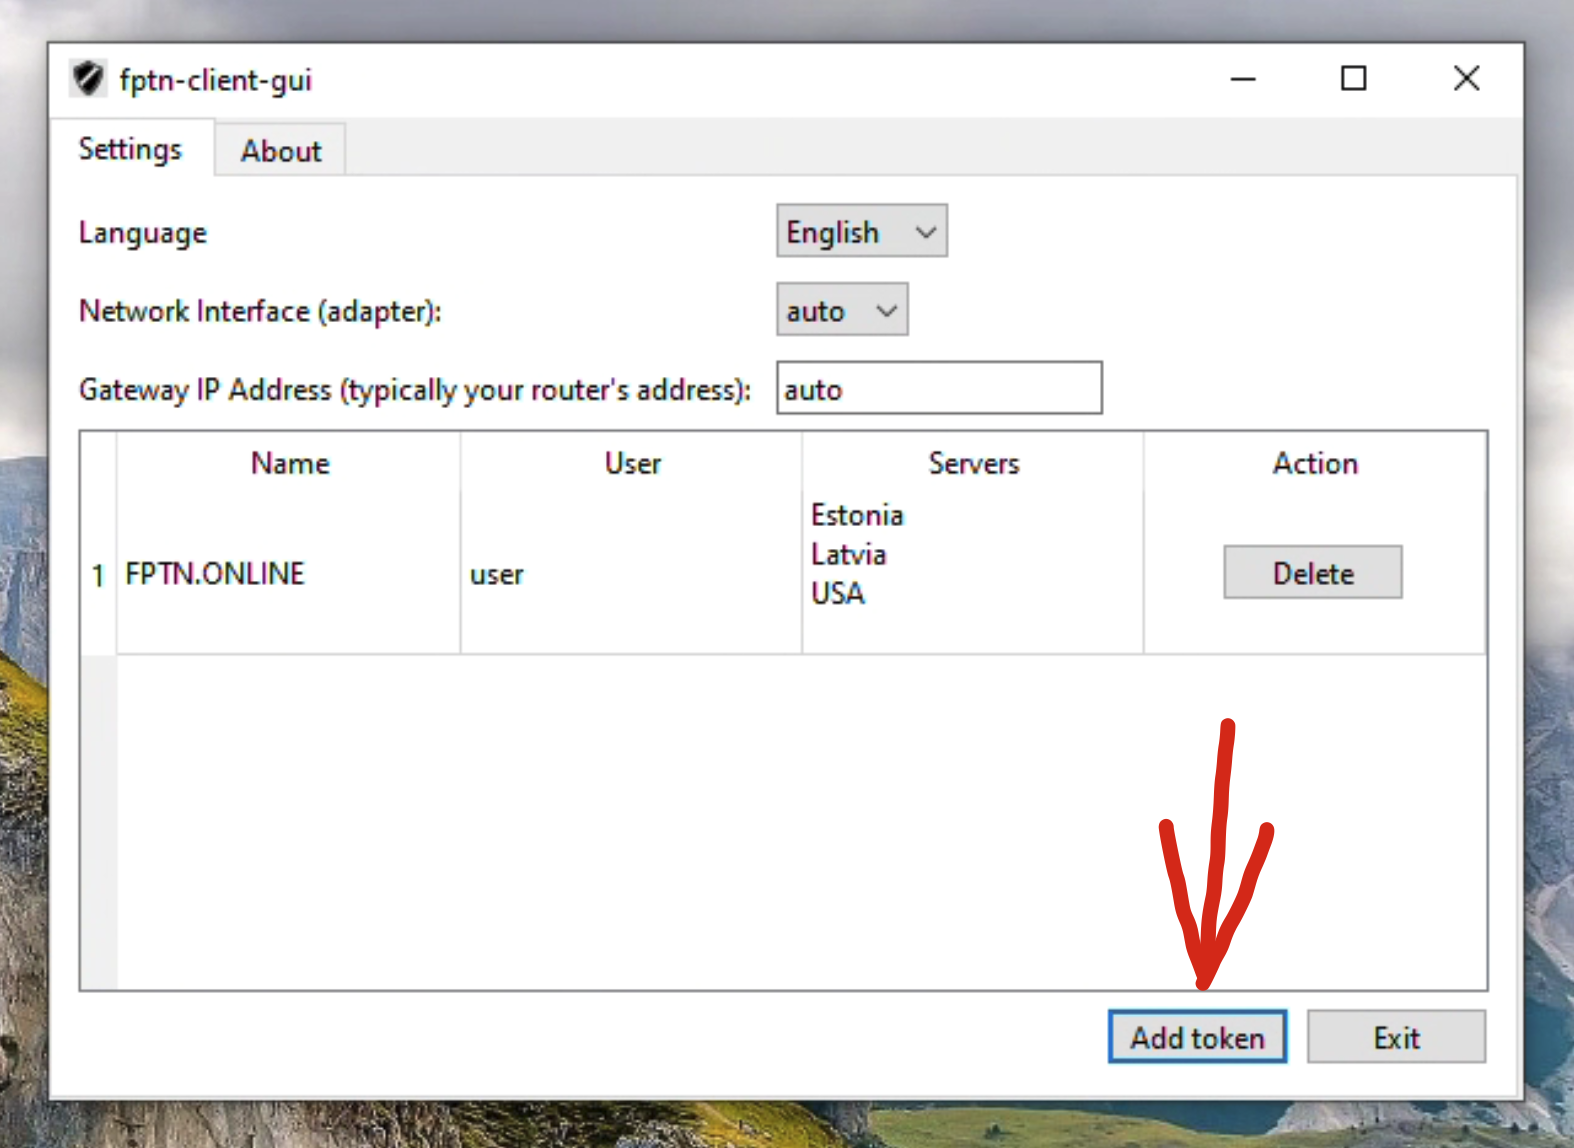
Paste the token from the Telegram bot and save it.
After saving, a list of available servers will appear. Simply close the settings window.
In the system tray, click on the application icon and select "Smart Connection". This will choose the most optimal server for you.
Done!
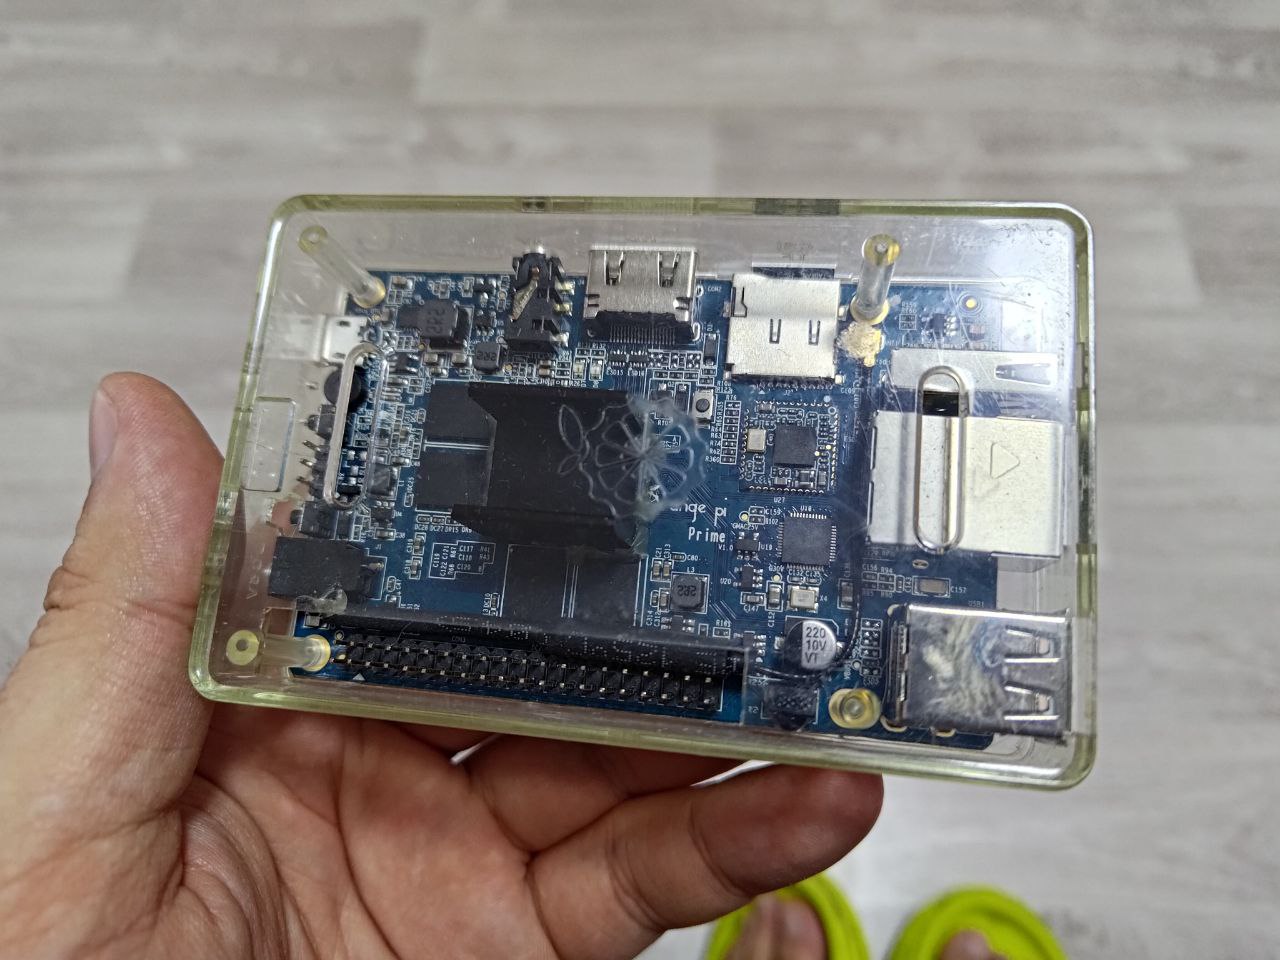
А еще, можно легко превратить RaspberryPi/OrangePi в WiFi-точку доступа и установить на неё FPTN-клиент.
В этом случае все устройства, подключённые к WiFi, получат доступ к интернету, обходя любые ограничения.
Информация тут
Любую помощь можно получить в нашем Telegram чате!
You can also easily turn a Raspberry Pi or Orange Pi into a WiFi access point and install the FPTN client on it.
In this case, all devices connected to the WiFi will have unrestricted internet access, bypassing any limitations.
More information here
For any assistance, feel free to join our Telegram chat!